
Create Your Pages
Now that you have WordPress installed on your domain you’re ready to start creating your pages and content! Remember, you can always get back to your WordPress owner dashboard by clicking the “W” icon in your DreamHost “Manage Websites” screen; just like we did in the previous lesson.
Clicking that takes you to your WordPress dashboard that only you can see. You can see your publicly viewable website by clicking the little home icon towards the top left corner. From your publicly viewable site you can get back to your owner dashboard by clicking the little speedometer icon towards the top left.
Create Your First New Page
Let’s create our first new page together. The screenshot below shows you where to find the Pages area in the lefthand menu of your owner dashboard.
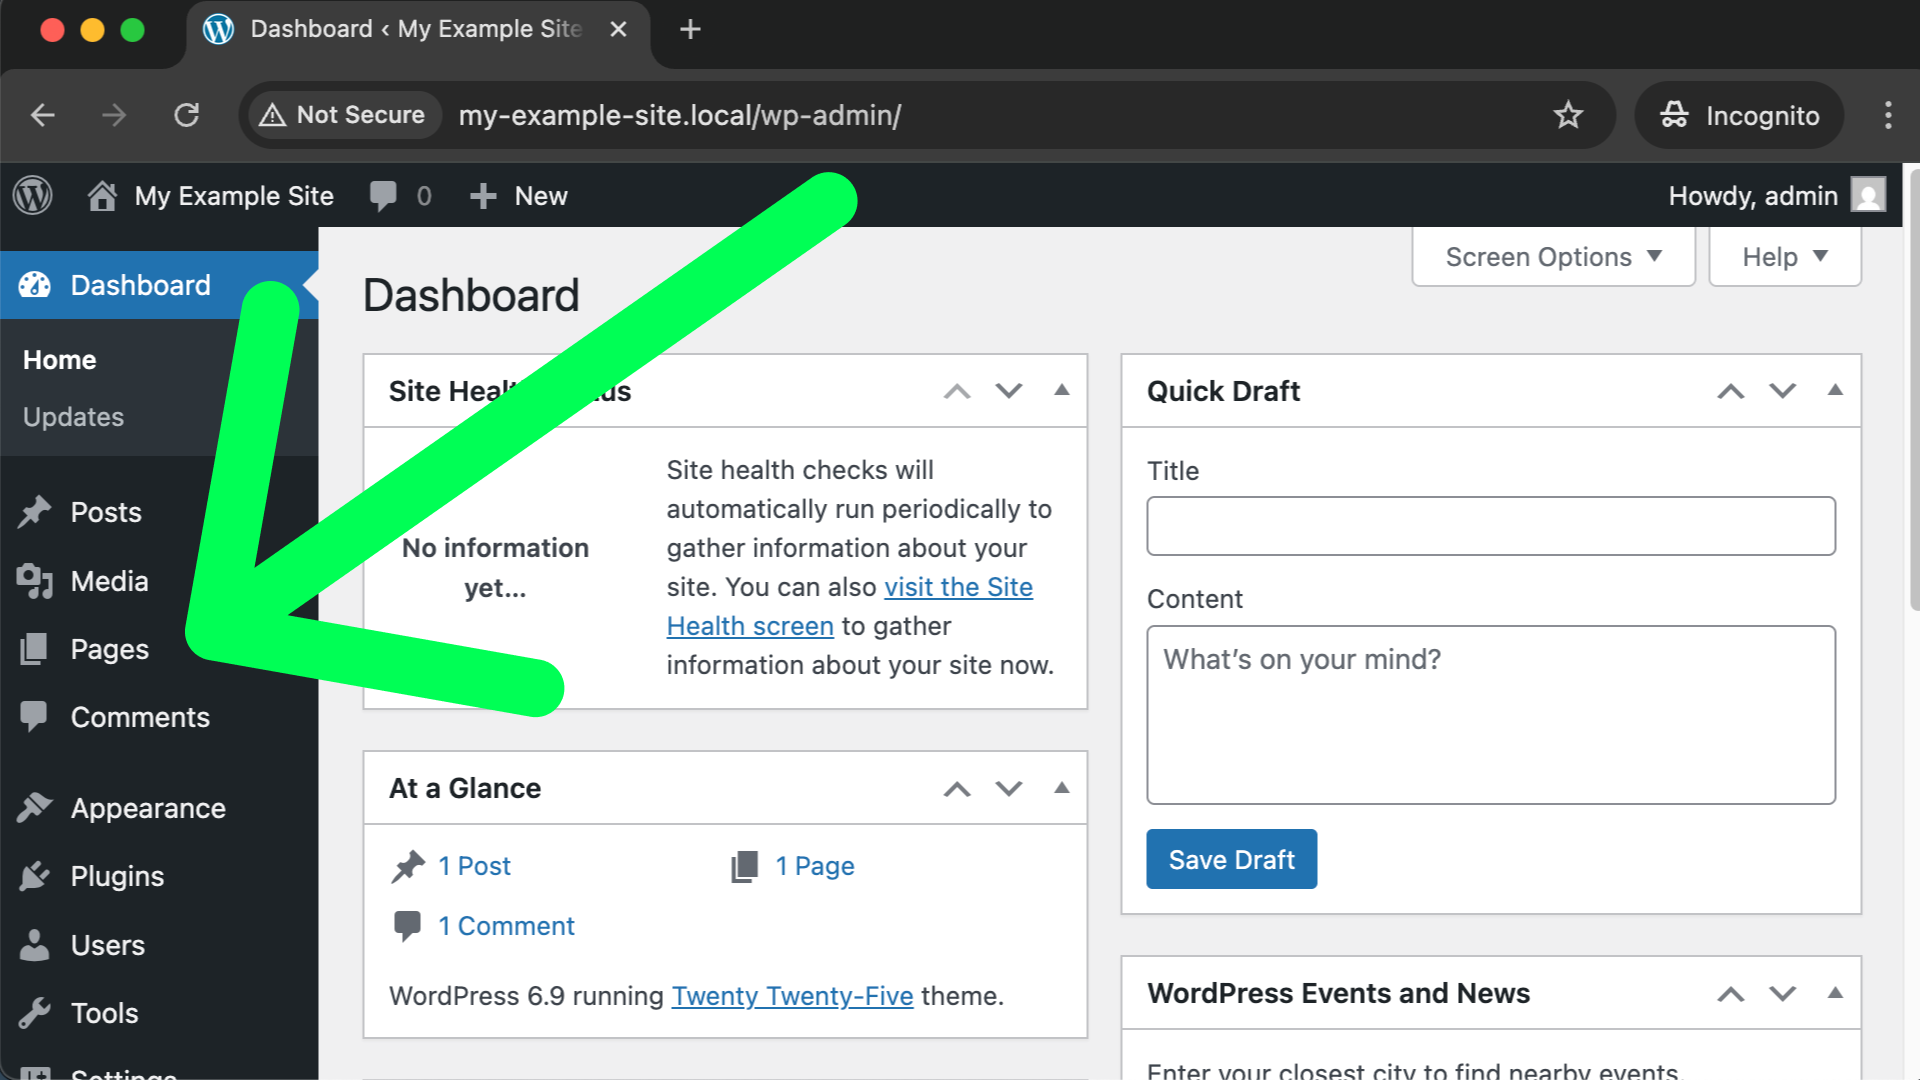
After clicking on “Pages” you’ll see a list of all your currently existing pages. If we wanted to edit an existing page we just click on the one we’re interested in. Right now we’re interested in creating a new page and the screenshot below shows you where to find either of the two “Add Page” buttons (they both do exactly the same thing).

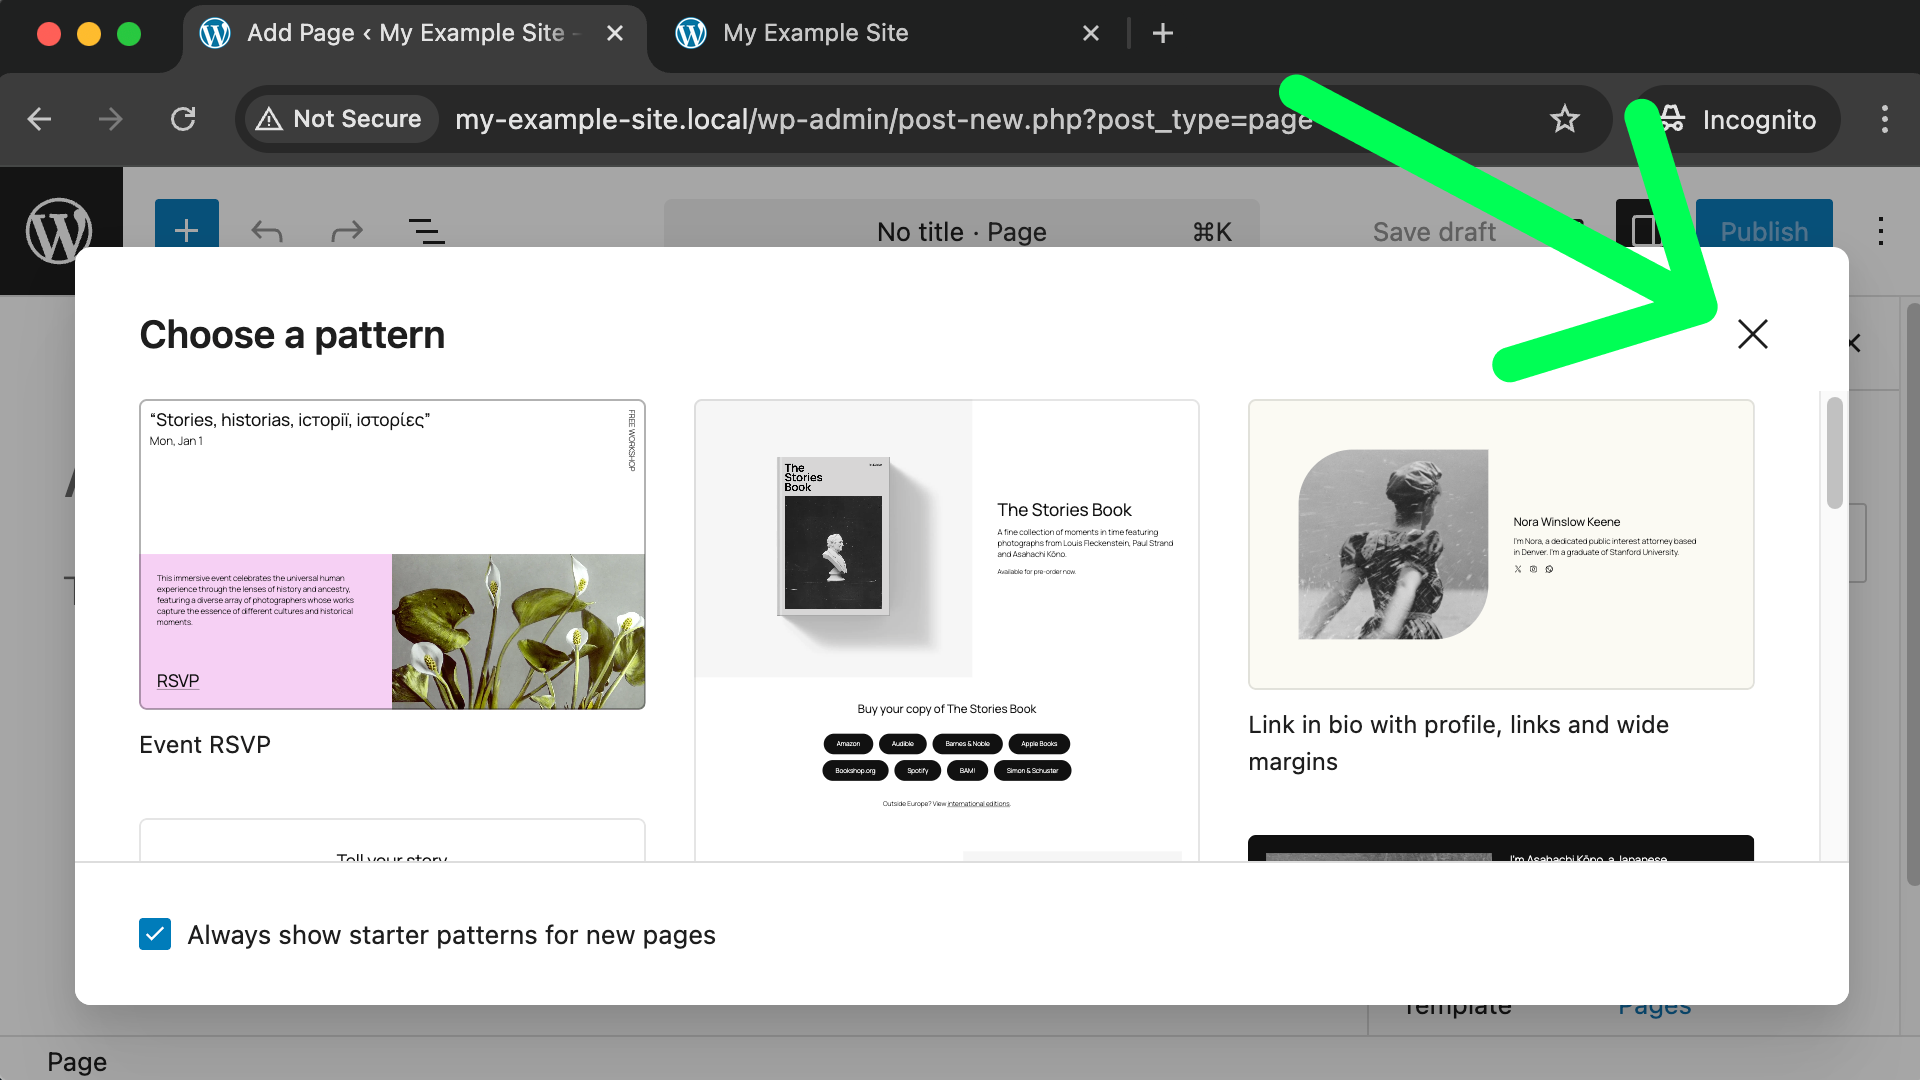
On the next screen you’ll see a potentially annoying “Patterns” pop-up screen. While patterns can be very useful once we’re more experienced, for right now, I recommend simply closing the Patterns pop-up using the “X” in the top right corner, as shown in the following screenshot.
After closing the Patterns pop-up we can start creating our new page. Every page in WordPress needs an overall title; I’ll give my first example page a title of Our History.
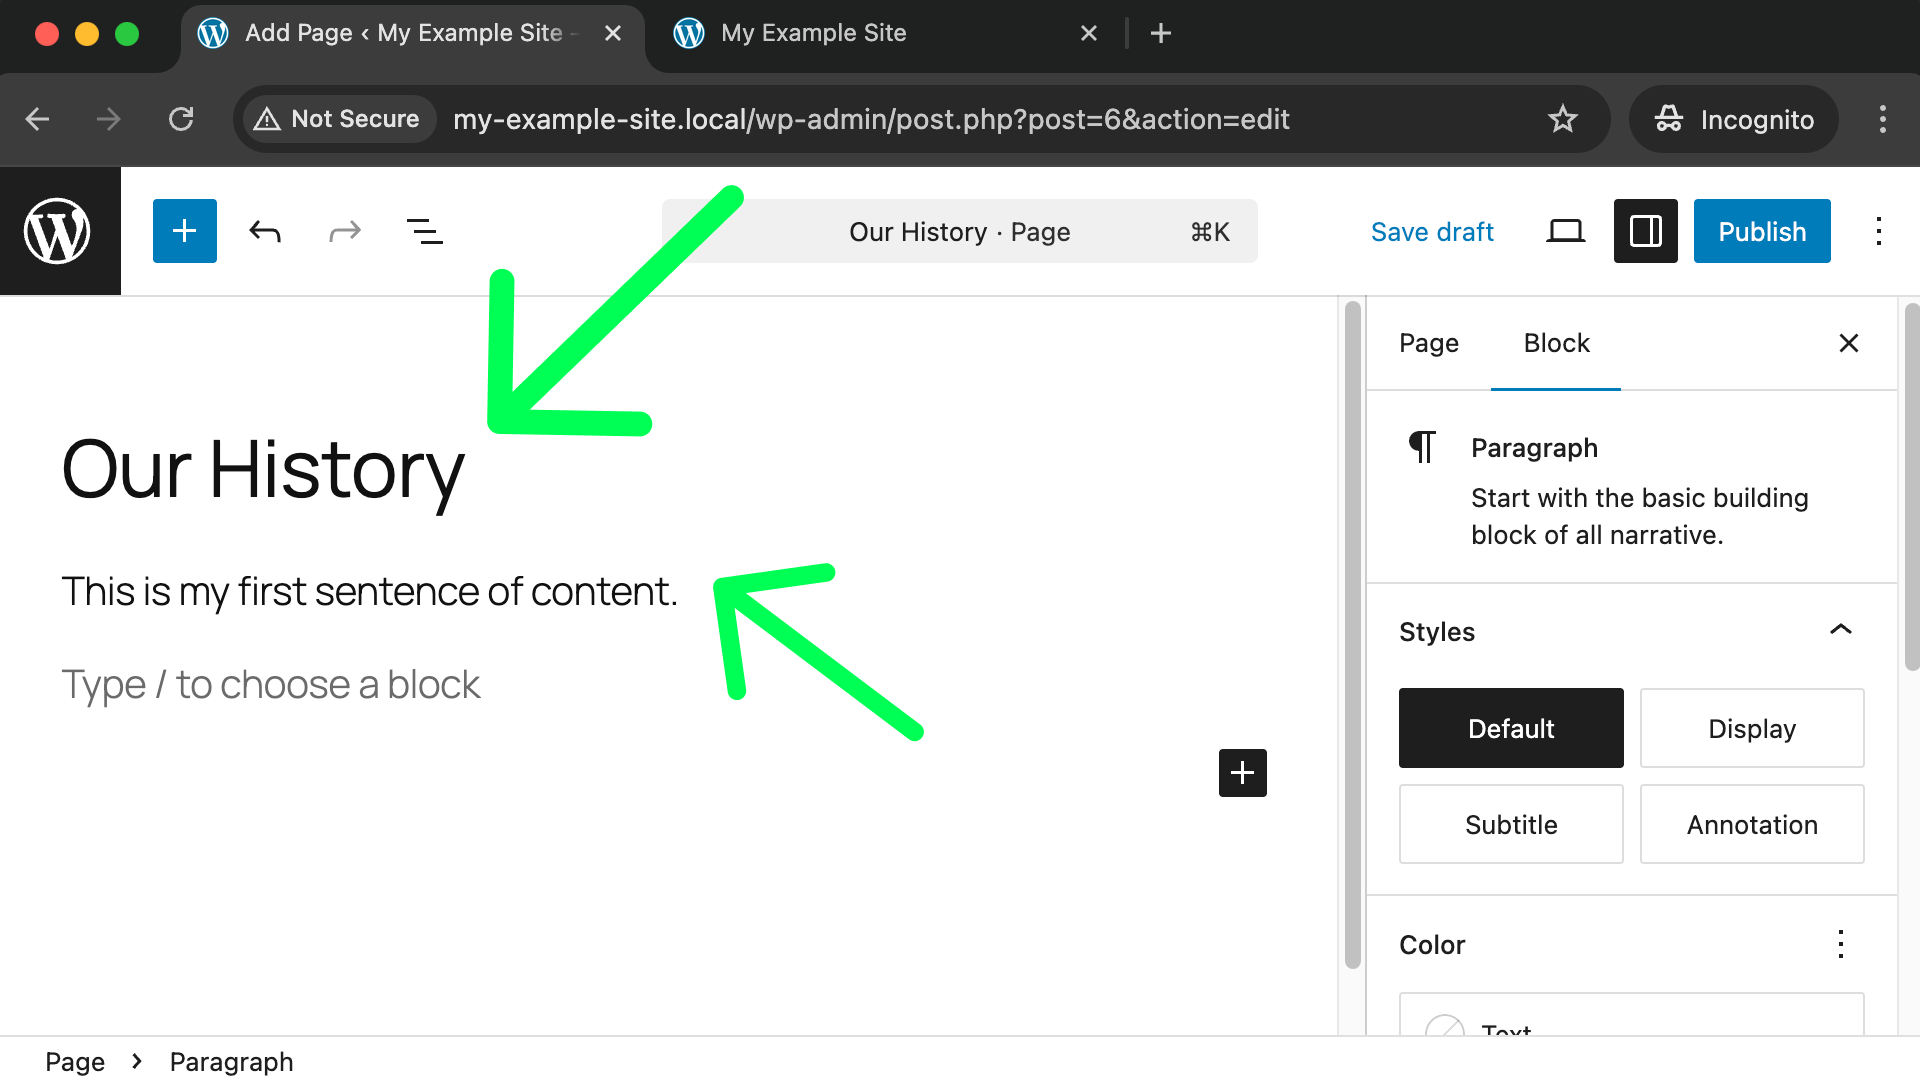
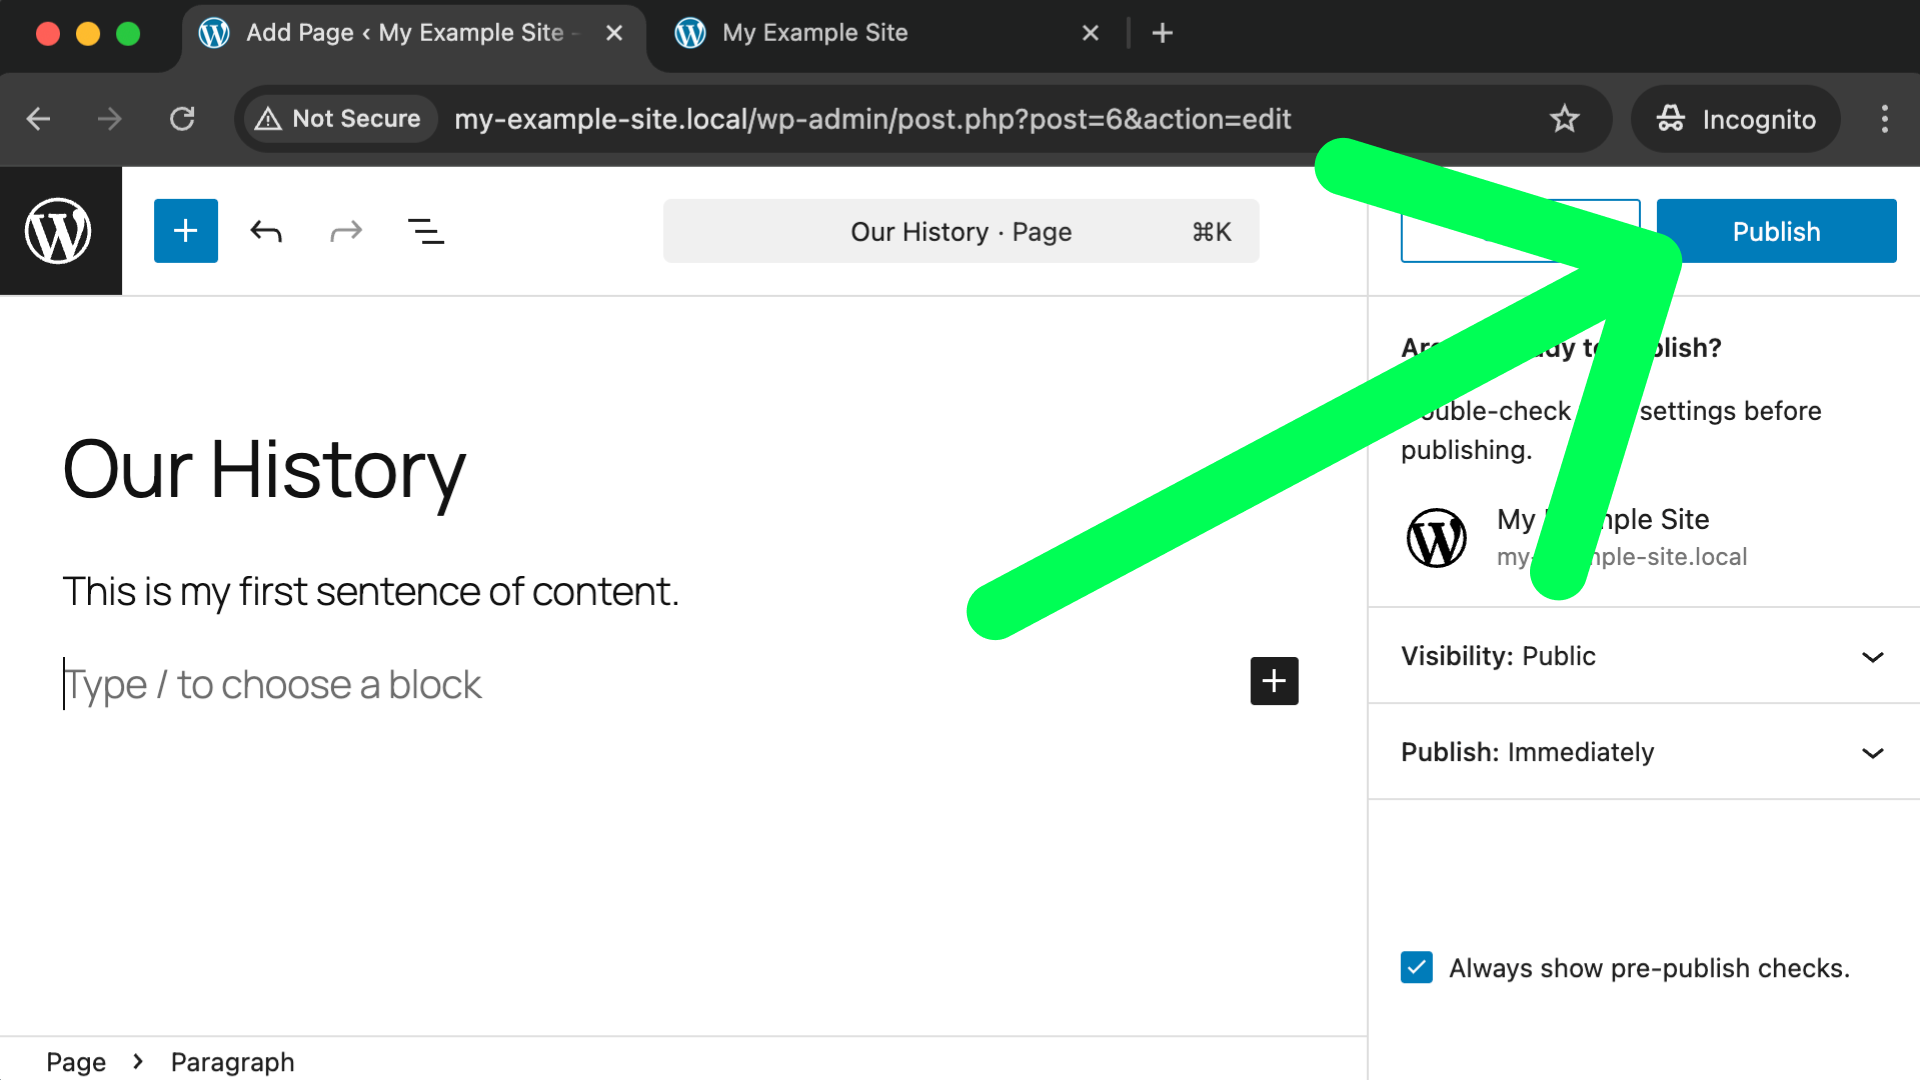
Below the title you can click to start typing out your actual content. Don’t worry, you’re not just limited to paragraphs of plain text. You can add all sorts of things like photos or nicely designed areas, but that can come later. For now let’s stay focused on learning how to create and manage a few new pages. Let’s imagine we’re happy with our title and a sentence of content and we’re ready to “save” our page. To do that, you click the blue “Publish” button in the top right corner of the screen.
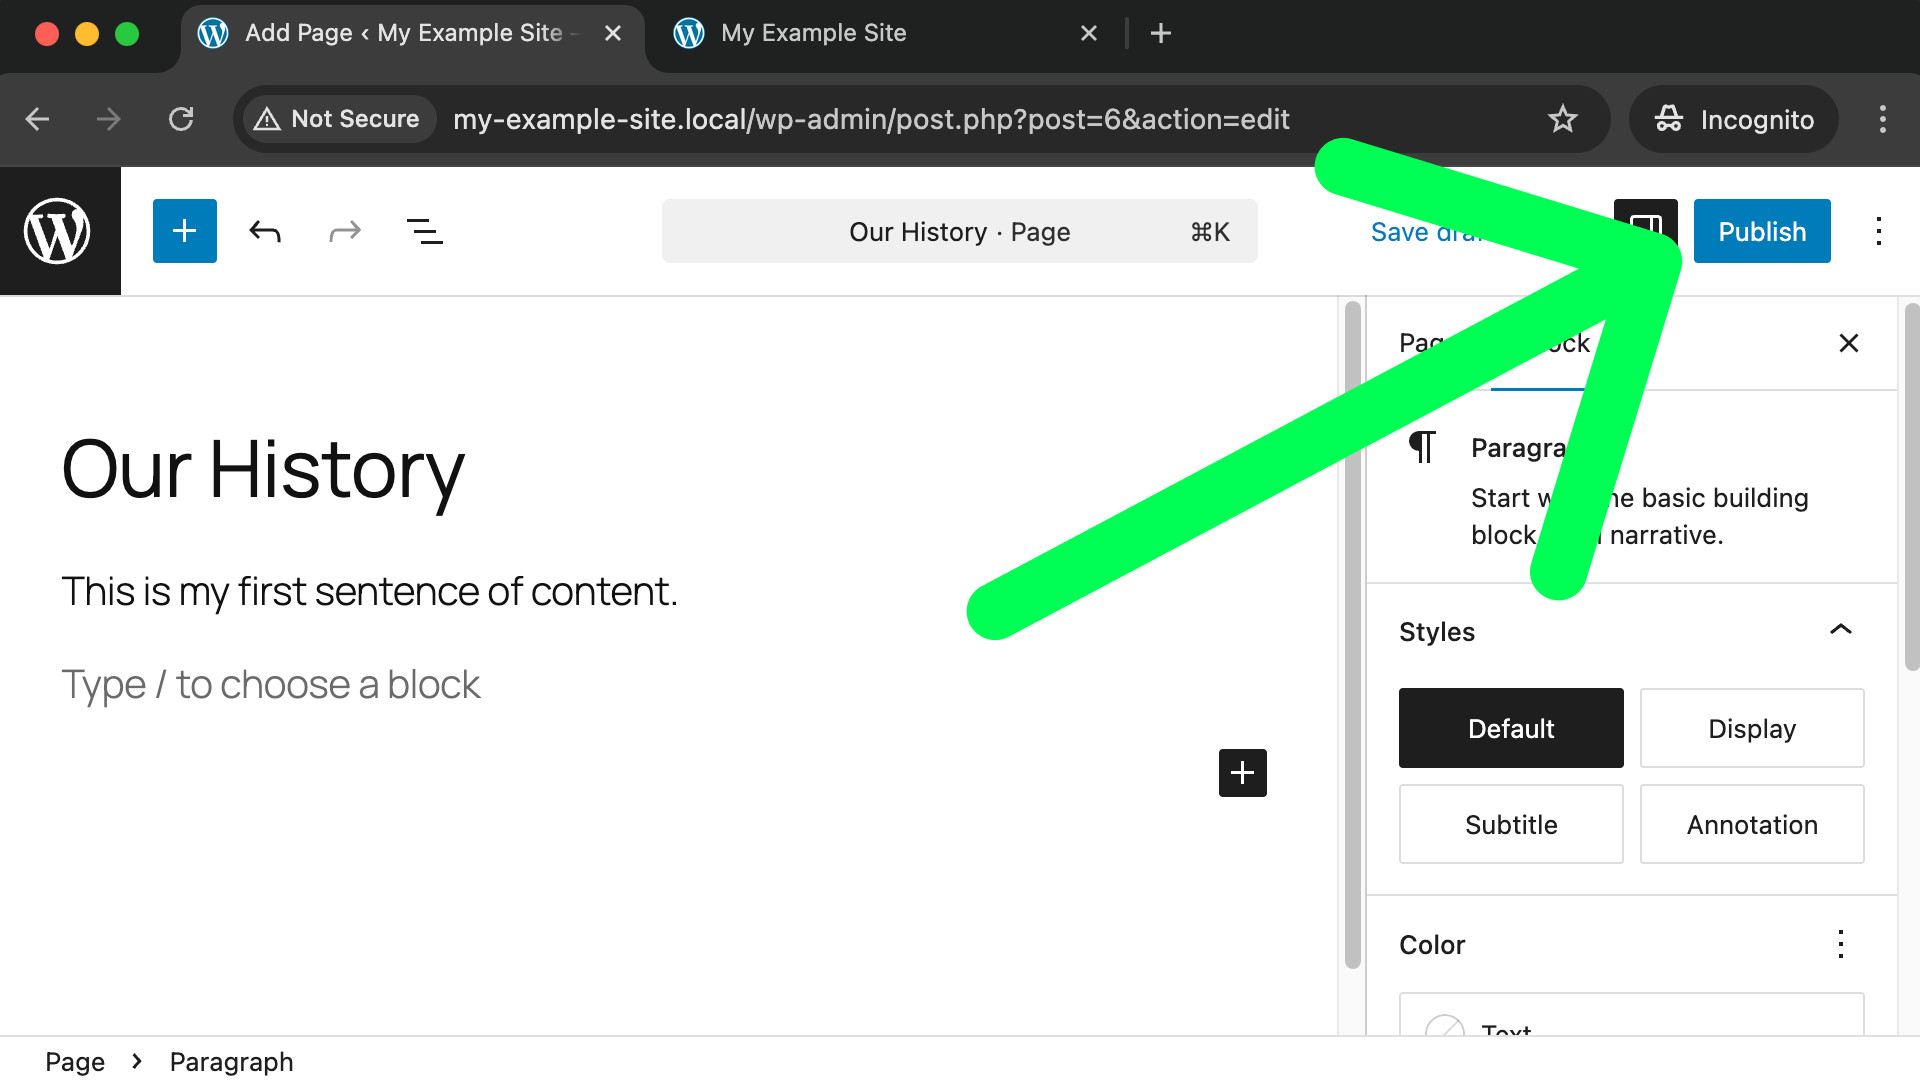
After clicking the Publish button it will ask if you’re ready to go public with this new page, and we’ll need to click the Publish button a second time.
After clicking “Publish” the second time our new page is available for the public to see! At this point I recommend exiting this “Create Page” screen and going back to our WordPress dashboard as a whole. We can do this by clicking the “W” logo in the top left corner.

From the Dashboard you can click the little home icon in the top left to see your public website and you’ll notice our new “Our History” page is now in the top right navigation.
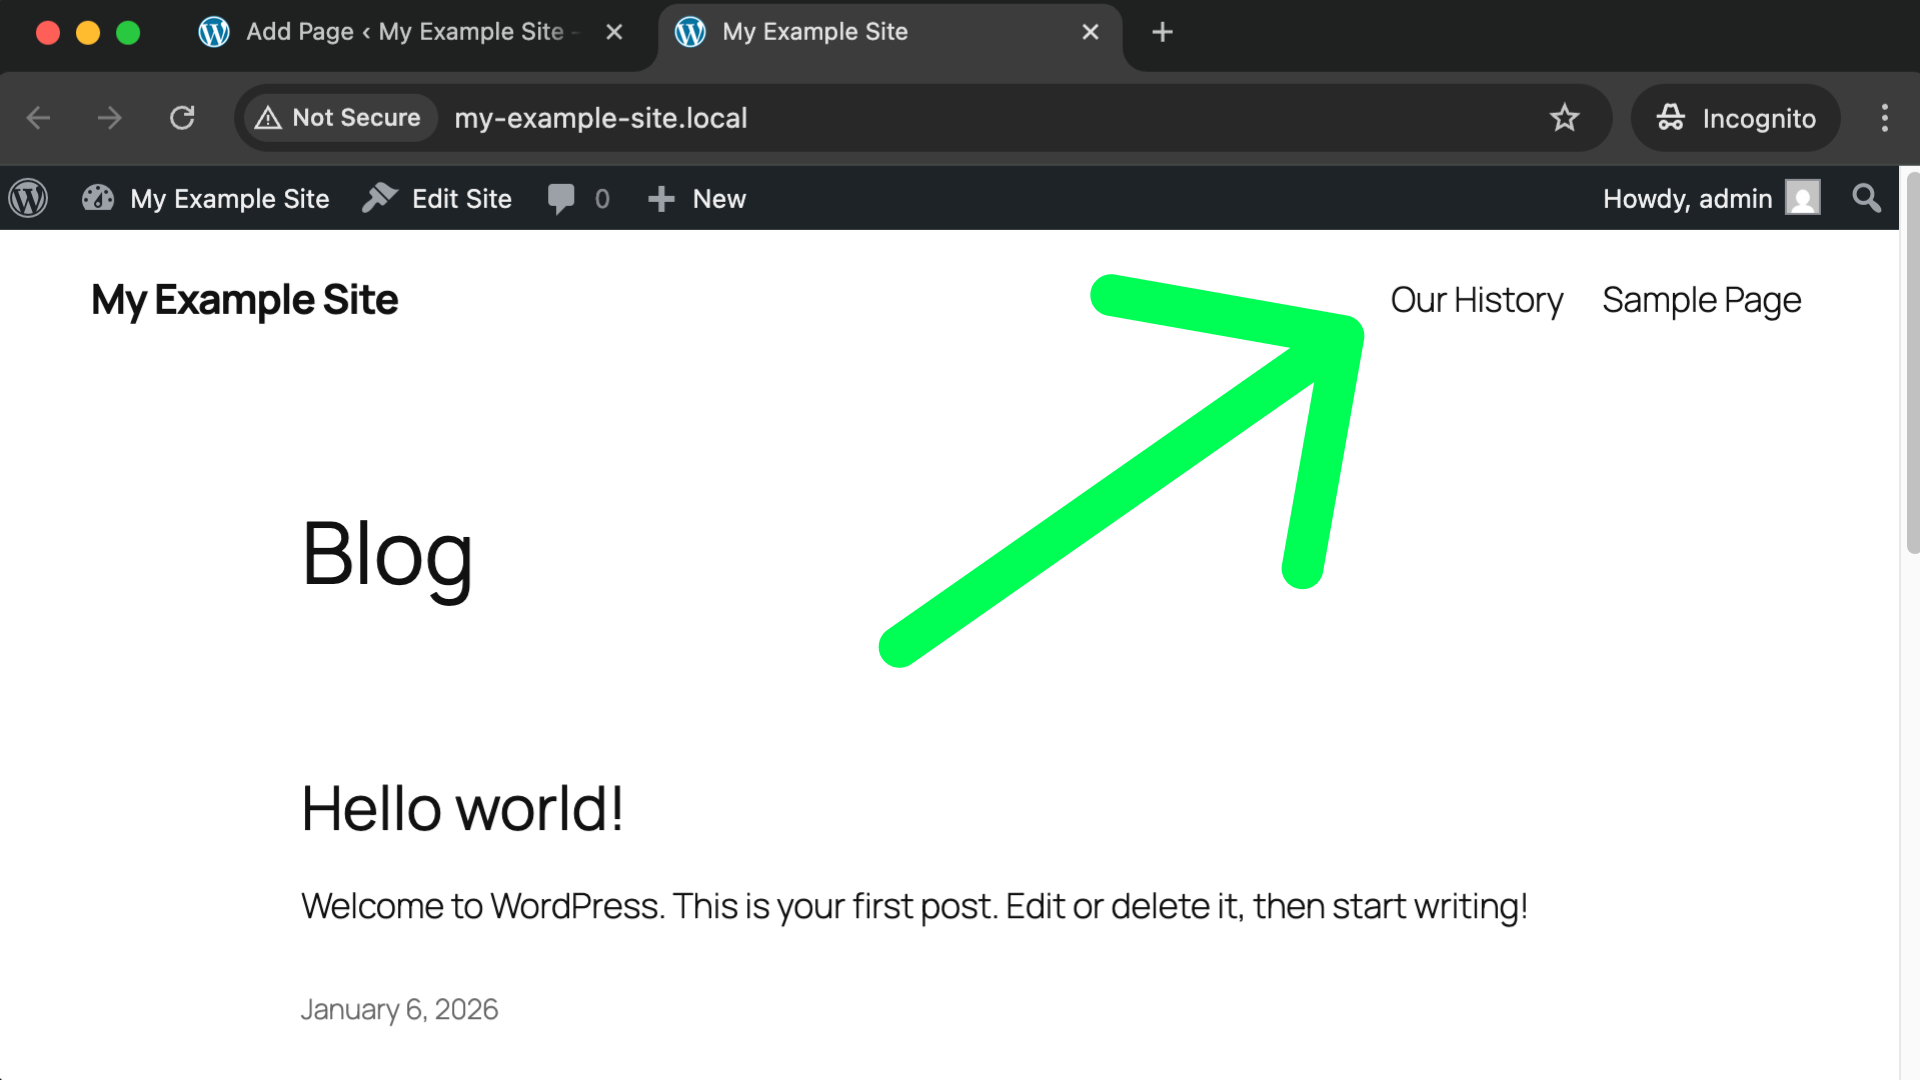
If you let DreamHost design your website for you (Option A in the previous lesson) your website might not look anything like this and therefore it might not have automatically added a link to your new page to the navigation. Don’t worry, in a few minutes from now we’ll learn how to take manual control of the navigation area.
Practice makes perfect so let’s create one more new page. We can use the same “Add Page” button that we did last time, and while filling out the new page I’ll name it “Our Process” and don’t forget to hit the top right “Publish” button twice.
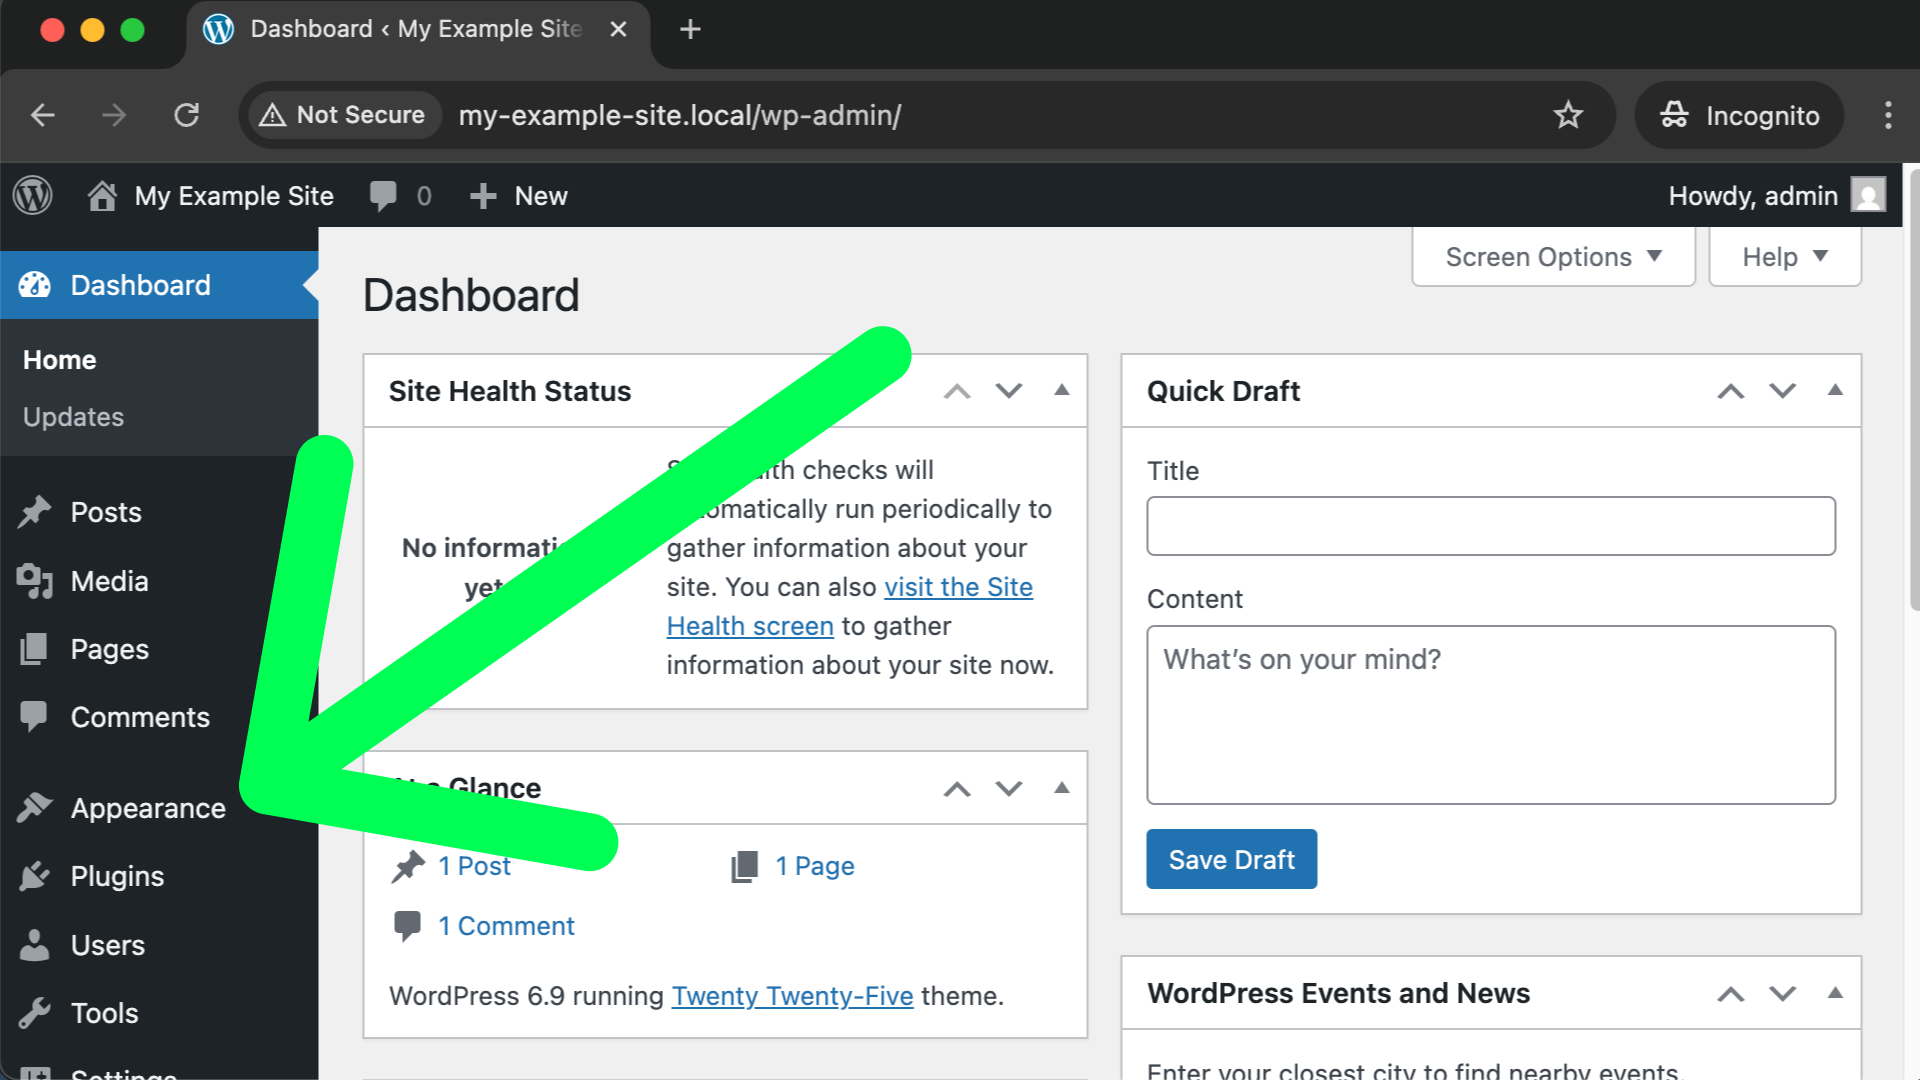
Now that I have “Our History” and “Our Process” pages I want to get rid of the “Sample Page” link in my site’s top right navigation. To do that, navigate to your overall WordPress owner dashboard and look for the “Appearance” link in the lefthand menu.
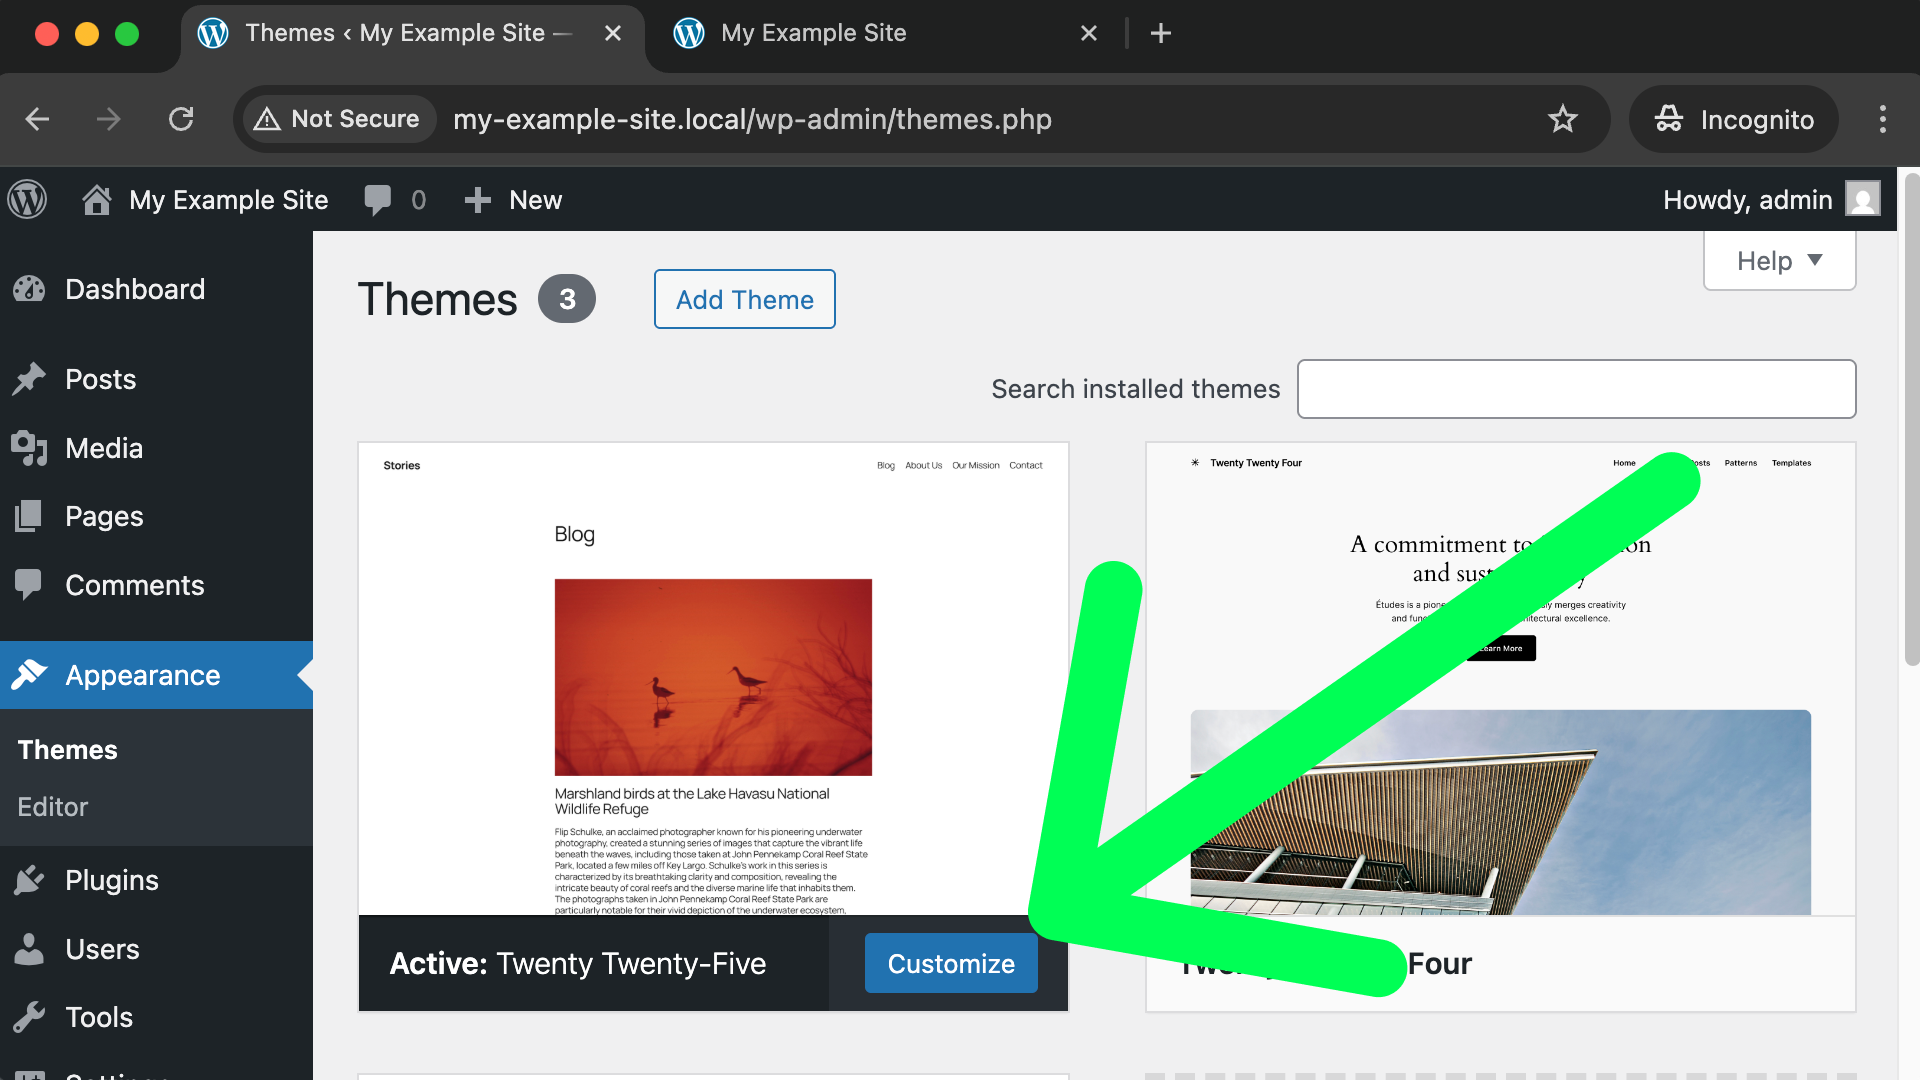
On the next screen you’ll see all of your currently installed themes and your currently activated theme is listed first. On that first theme click the blue “Customize” button; shown in the following screenshot.
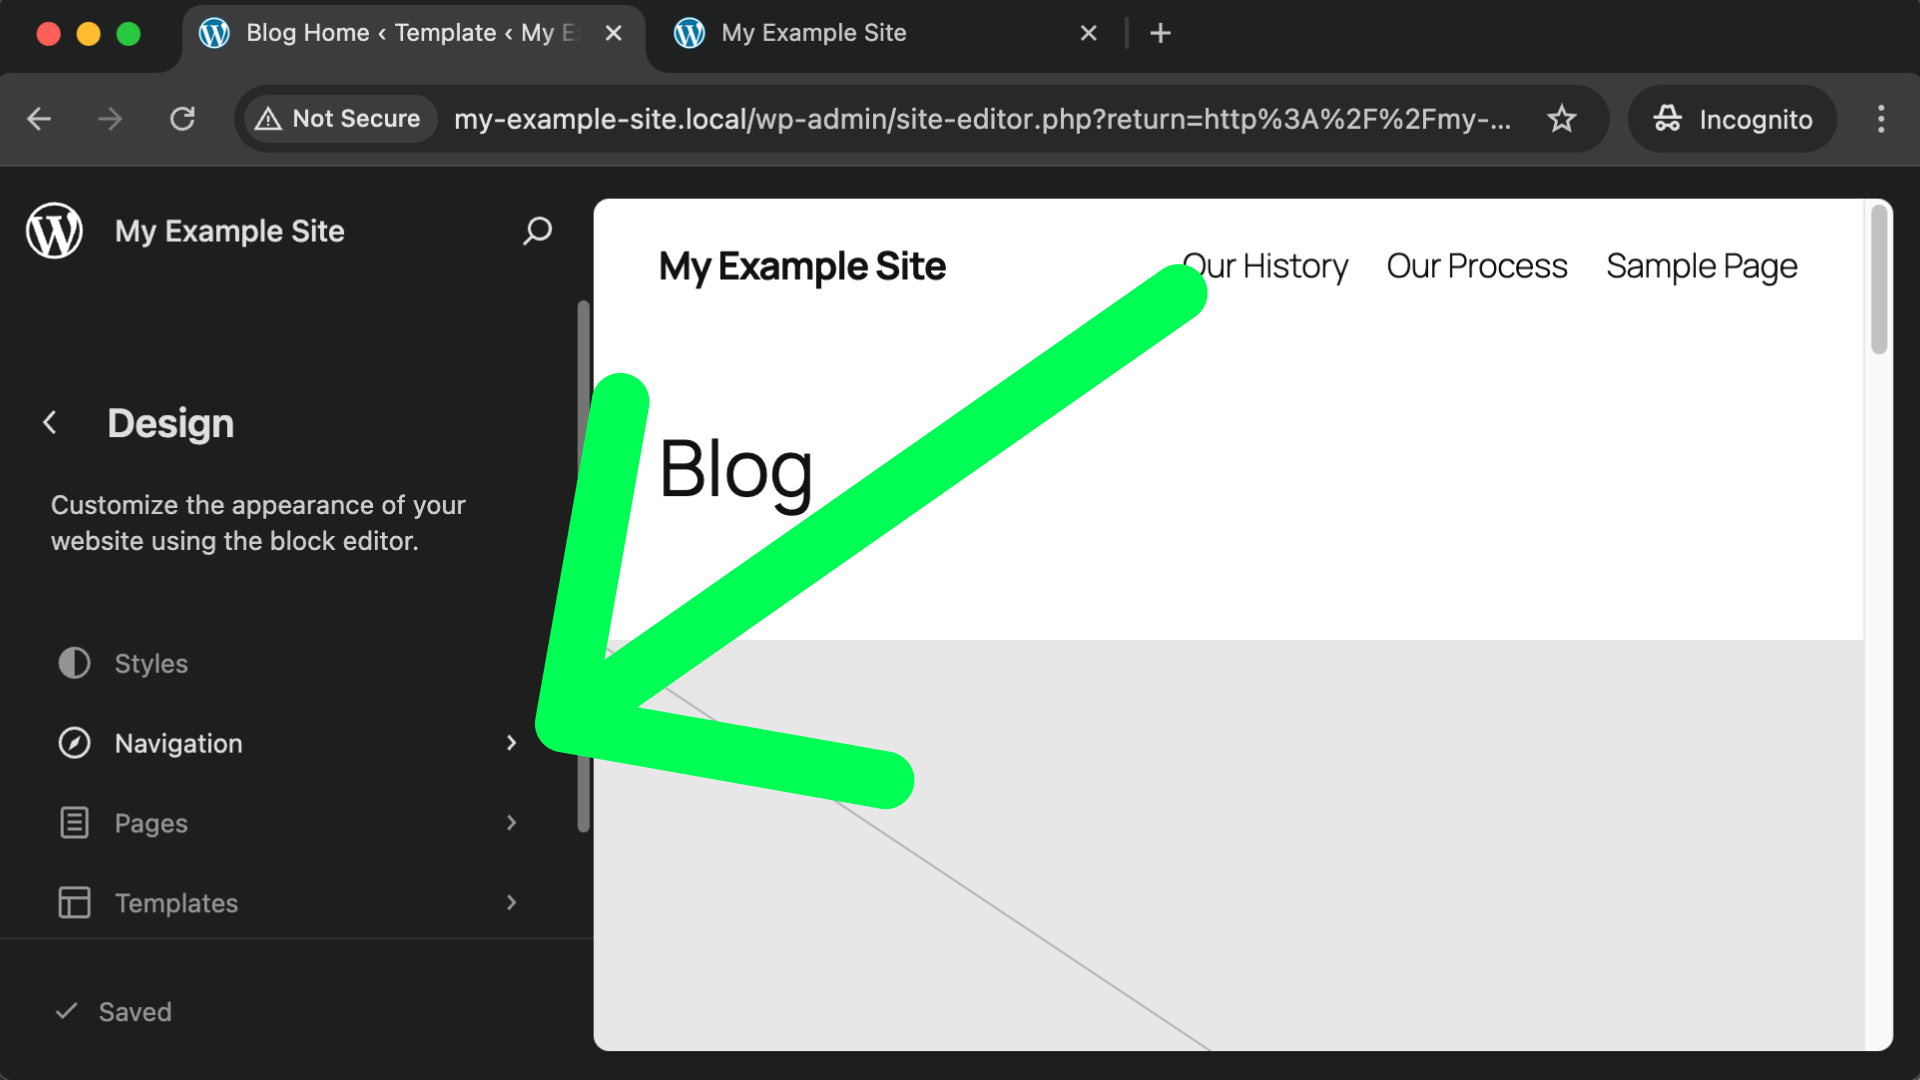
On the next screen click on “Navigation.”
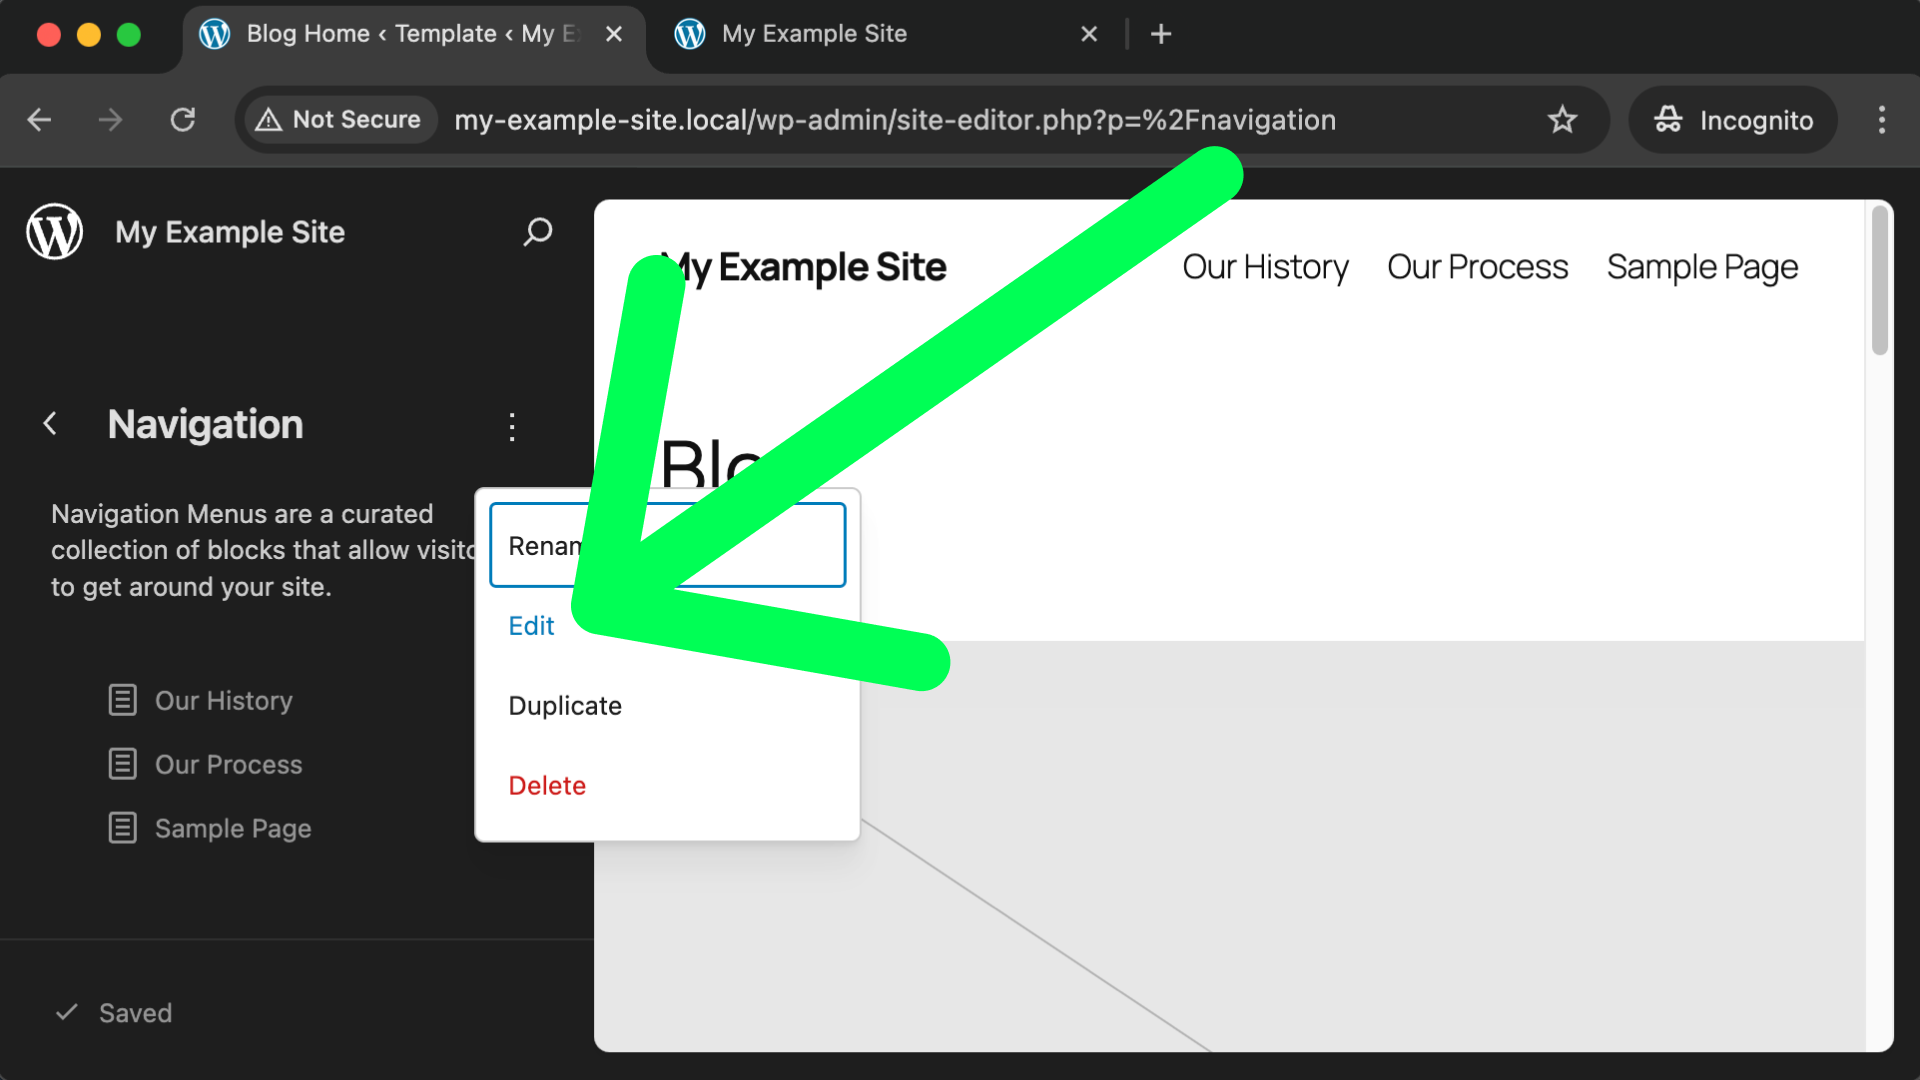
On the next screen click the 3 dots and then click “Edit” as shown in the following screenshot.
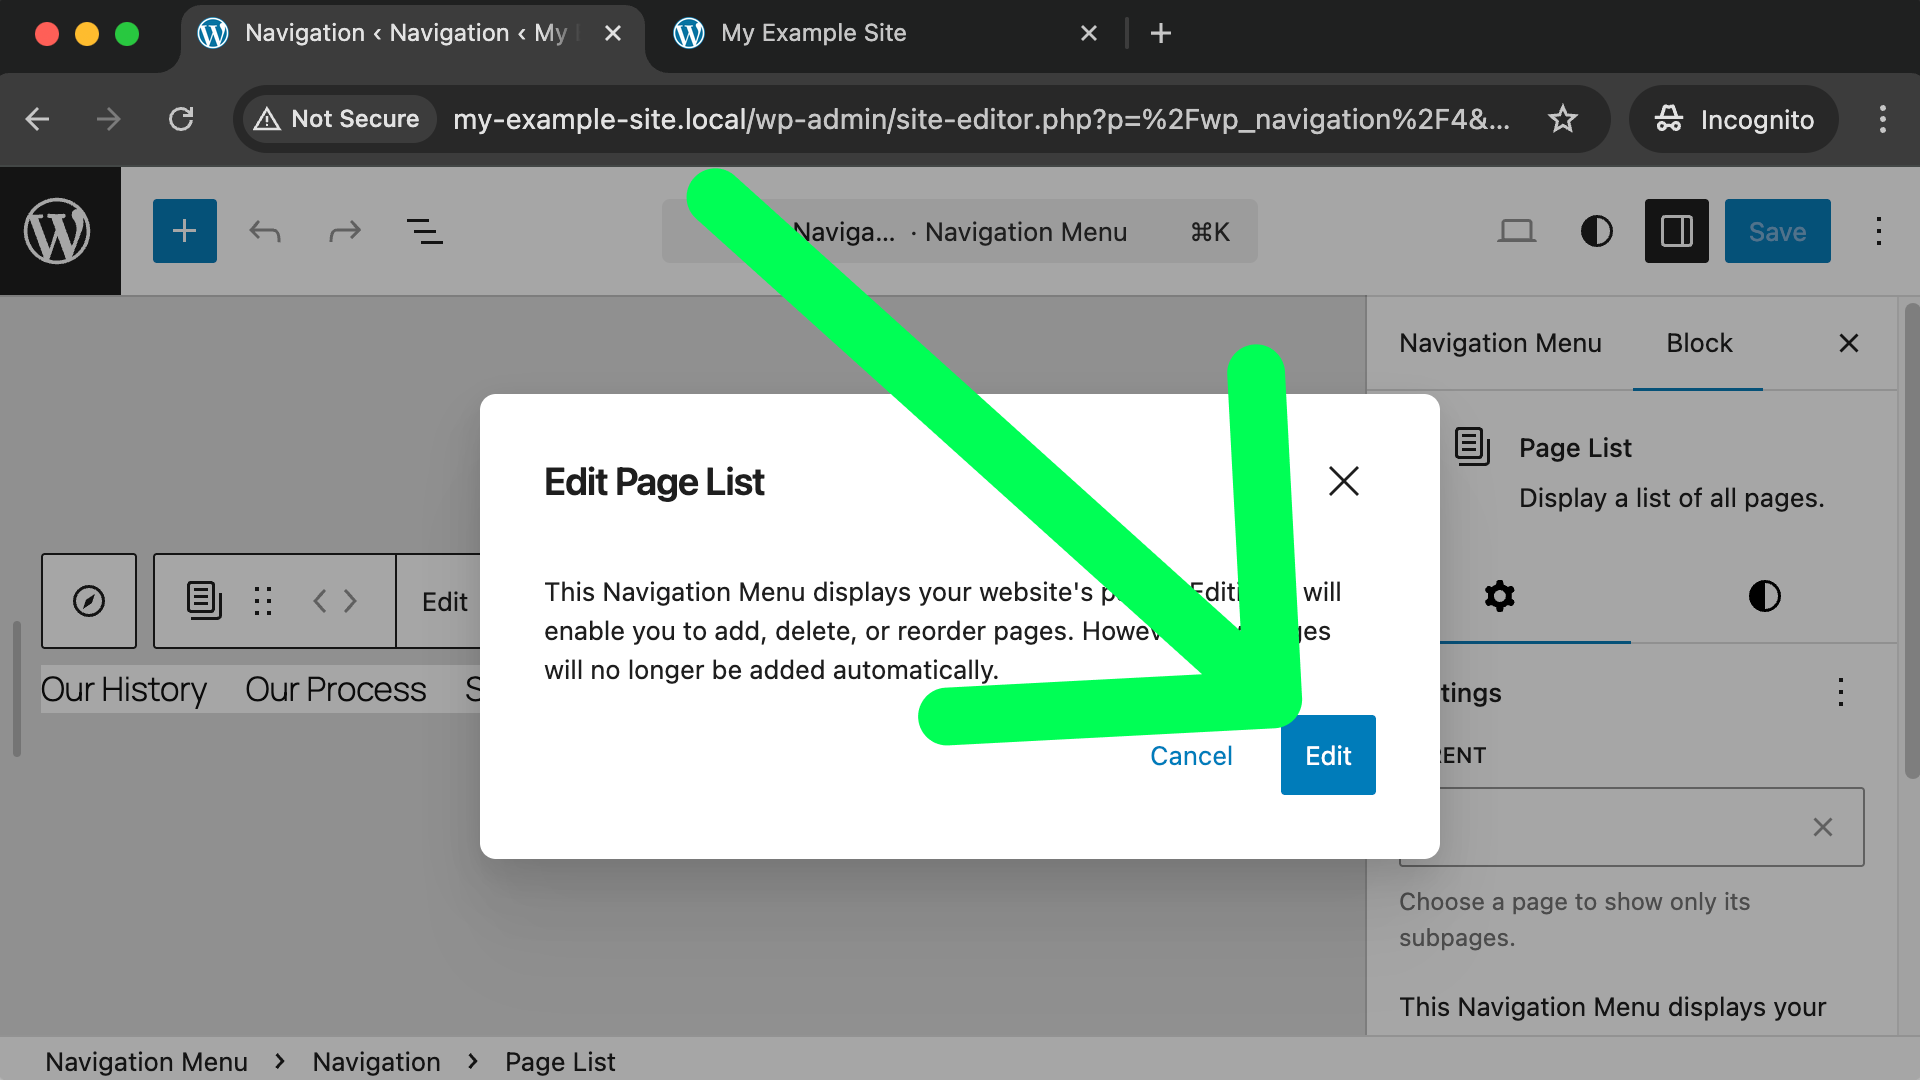
On the next screen, after clicking on our collection of pages a menu should appear and we can click “Edit” once again.

You’ll see a pop-up warning you that if you edit this menu it will no longer “automagically” add links to any new pages you create. That’s fine, we want to take manual control of the navigation.
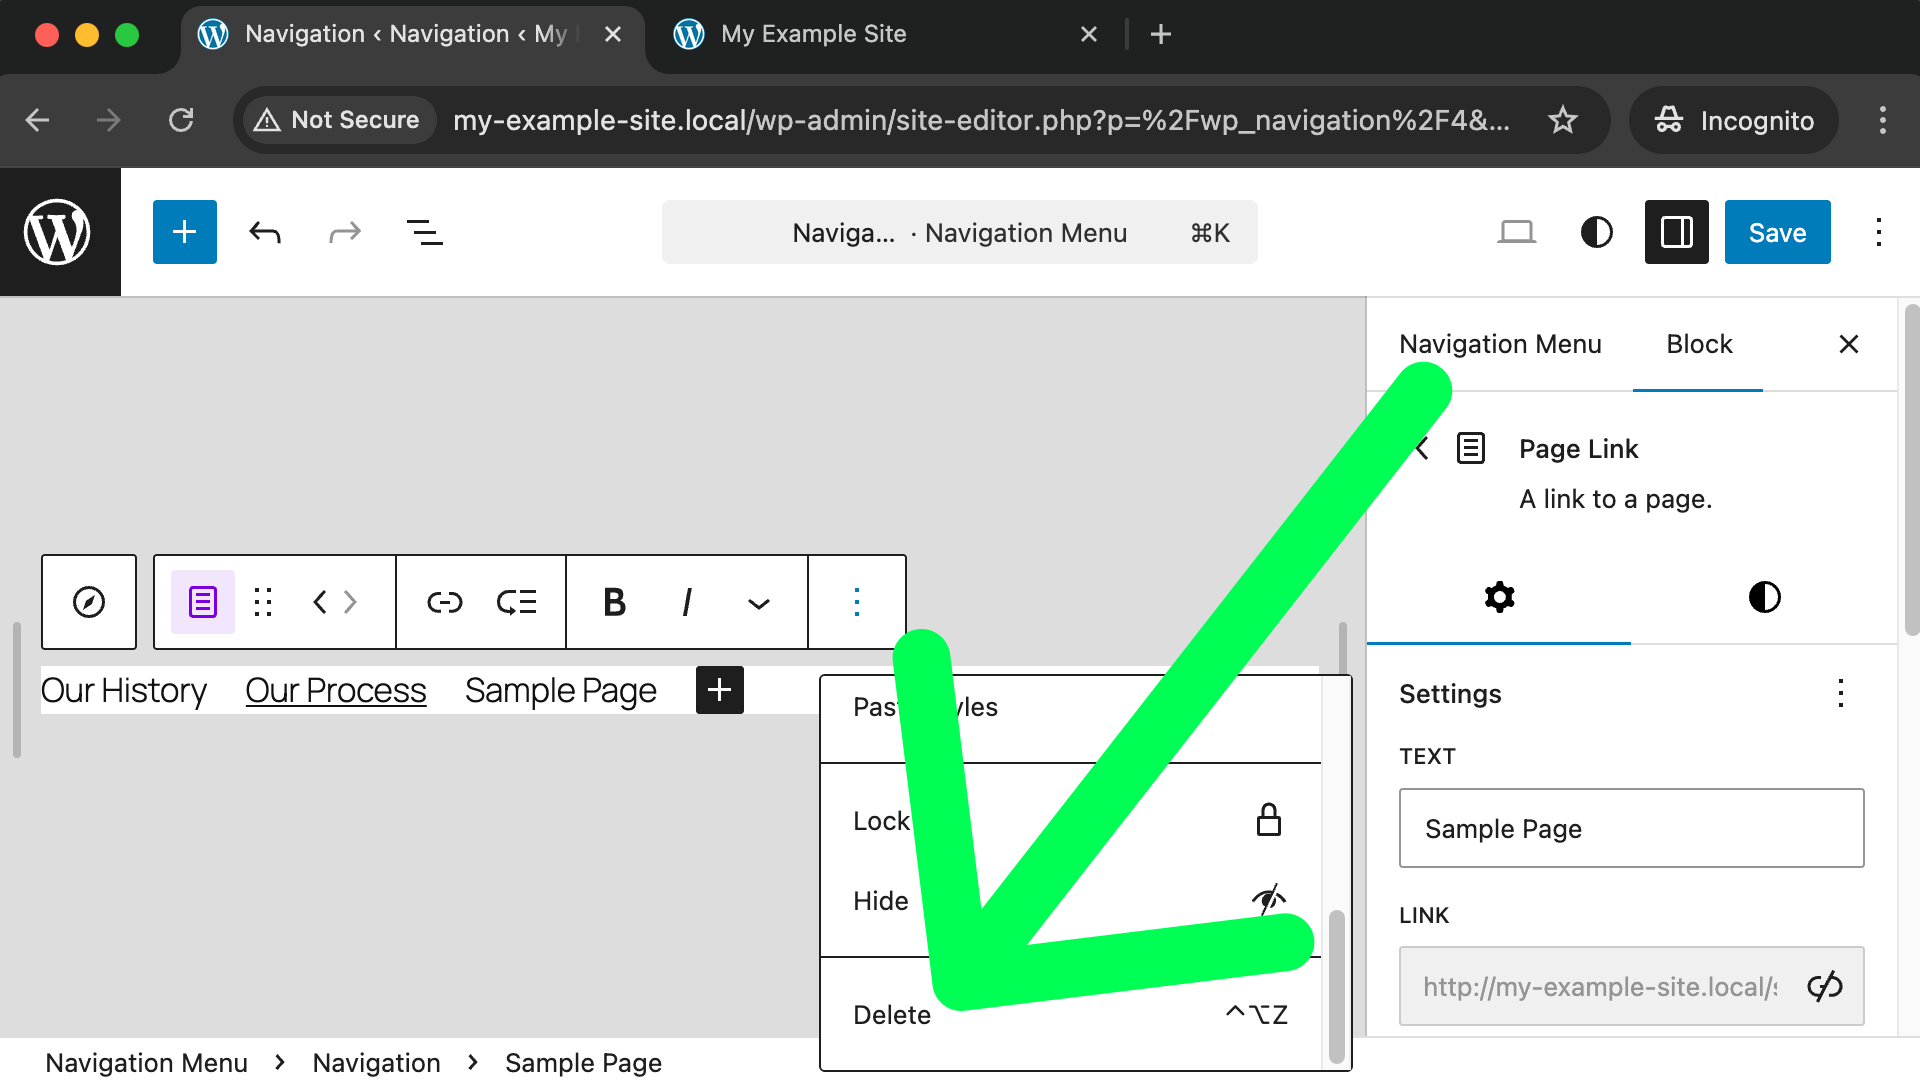
Click on the “Sample Page” or whichever link you want to delete, and in the menu that appears click on the three dots towards the right and then choose the “Delete” option, as shown in this screenshot:
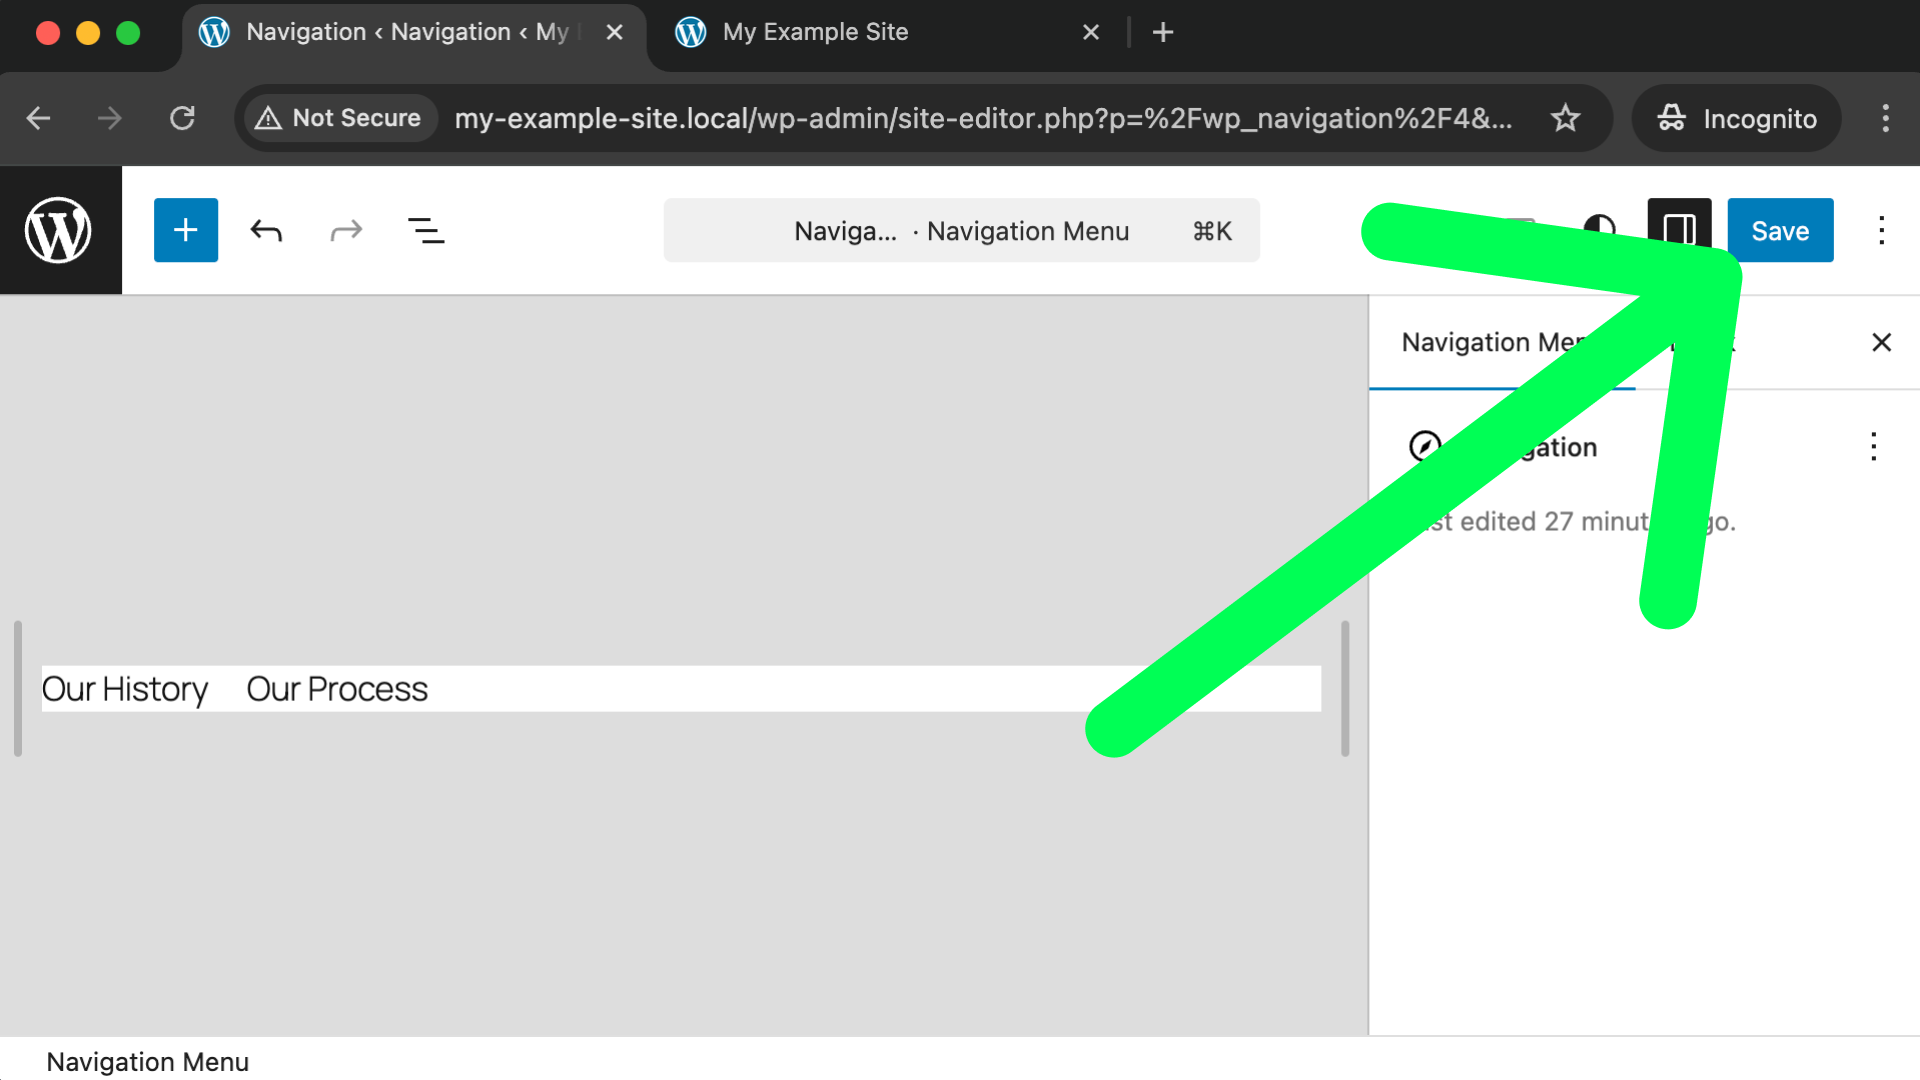
Finally, don’t forget to lock in your changes by clicking the blue “Save” button in the top right corner.
Perfect, you can now use the “W” icon in the top left corner to go back to your Dashboard. And remember, from the dashboard, you can always see what your public website looks like by using the little home icon towards the top left.
We’ve successfully created a couple new pages and our site’s navigation now includes links to them for our visitors to use! This is great for permanent content, but what if you want your website to have a “News” or “Blog” area that always pulls in the newest few articles that you write? That’s exactly what we’ll cover next!
