
Get WordPress Up & Running
Now that you have your domain and hosting secured it’s time to build your actual website; the text, images, colors, pages and interactive forms that you want. You don’t need any technical experience to do this; you can use the same free and open source software that’s used by NASA, Rolling Stone, Sony Playstation, Harvard, Microsoft and the Walt Disney Company. The software I’m referring to is called WordPress and it powers over 43% of all sites on the internet.
Just because something is popular doesn’t mean it’s good; I’ve personally used WordPress for 20 years and even if it wasn’t as popular as it is today I’d still recommend it wholeheartedly. It’s just that good. And it’s free. Good and free is a hard combination to beat. Maybe that’s why it’s so popular 😉.
The Choice Is Yours
So, how do we start using WordPress? Luckily, DreamHost makes it as easy and stress-free as possible. All you have to do is decide if you:
- (A) want a website created for you that you can just make a few edits to and be done.
- (B) want to make all of those decisions yourself from the start?
I ask you this because DreamHost offers us 2 options in terms of how we want to get started with WordPress:
(A) You can use Liftoff, DreamHosts’s AI site builder: you just tell it a little bit about your business or what you want the website to be about, and it will create the WordPress website for you, and honestly, it’s surprisingly good. You’ll still want to swap out its stock photos with your real photos here and there, and edit the text to suit you and your needs, but it will create a nice looking site with all the essential pages and get you up and running quickly.
(B) You can start with a “vanilla” WordPress installation and create the pages and design and content yourself. You still won’t need any technical experience.
Let’s Actually Start
Regardless of which option you choose you can do it yourself with just a few clicks in the DreamHost dashboard. Let me show you how!
First, make sure you’re logged in to the DreamHost Panel (Dashboard). Once you’re logged in it should look like the screenshot below.
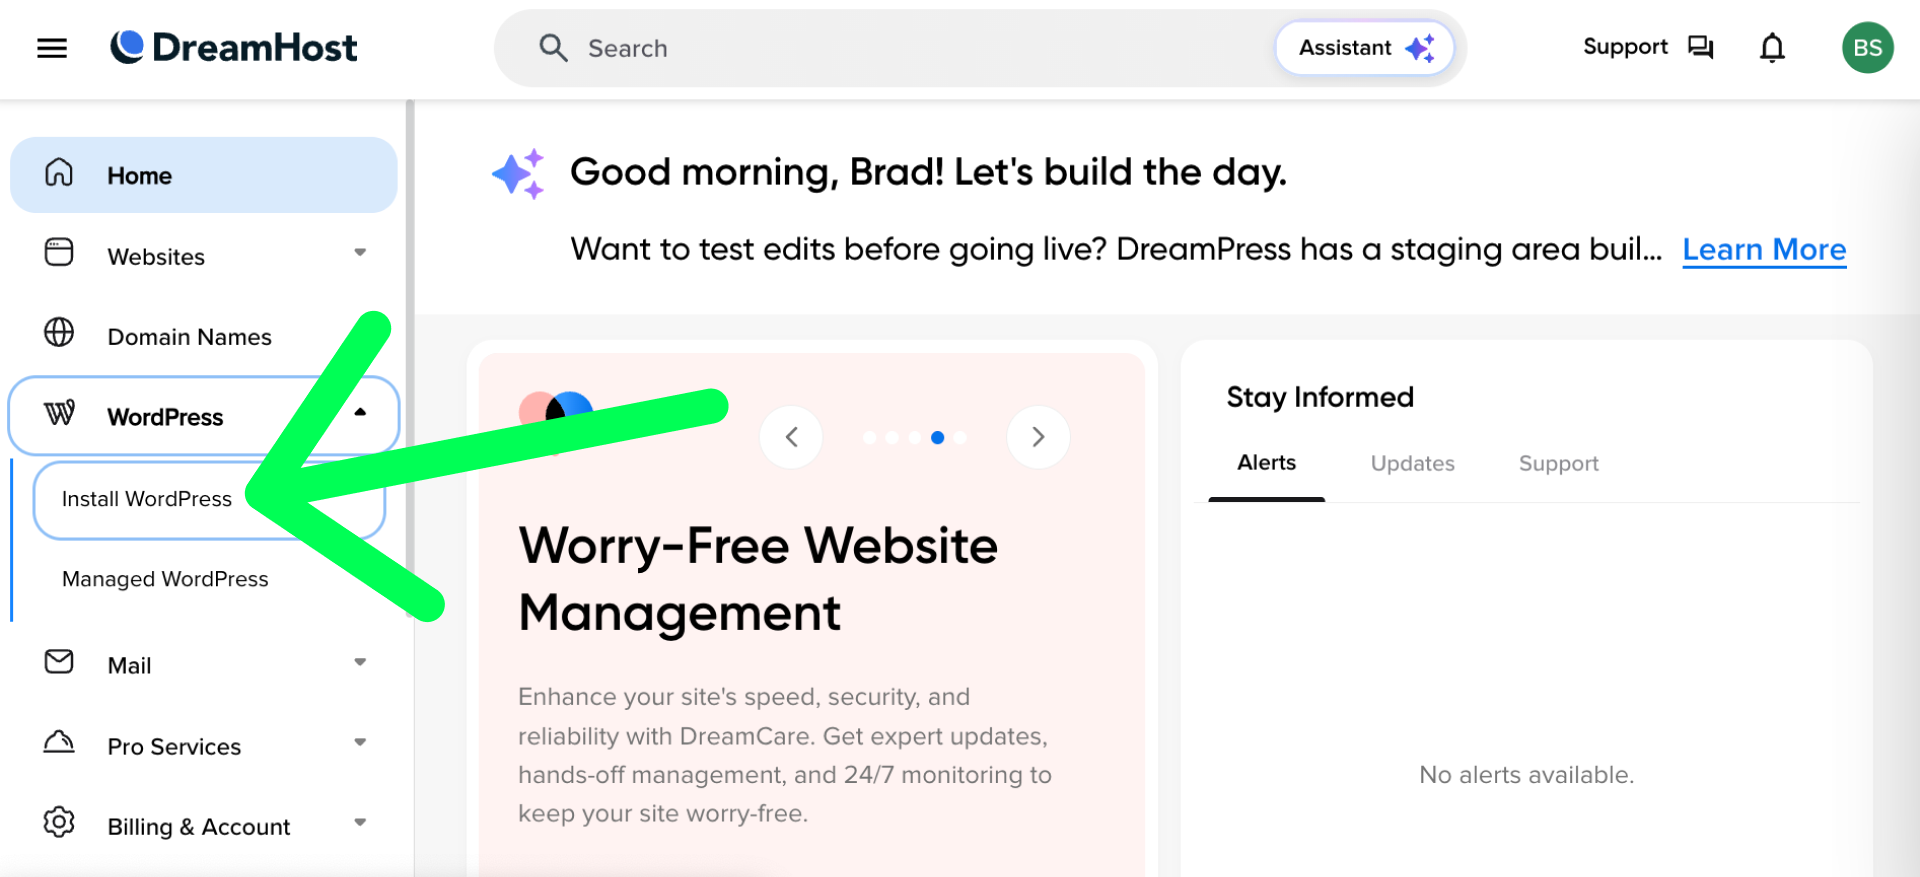
In the lefthand menu click on WordPress and in the new menu that appears below WordPress click on the “Install WordPress” text. You should then see a screen that looks something like the screenshot below:
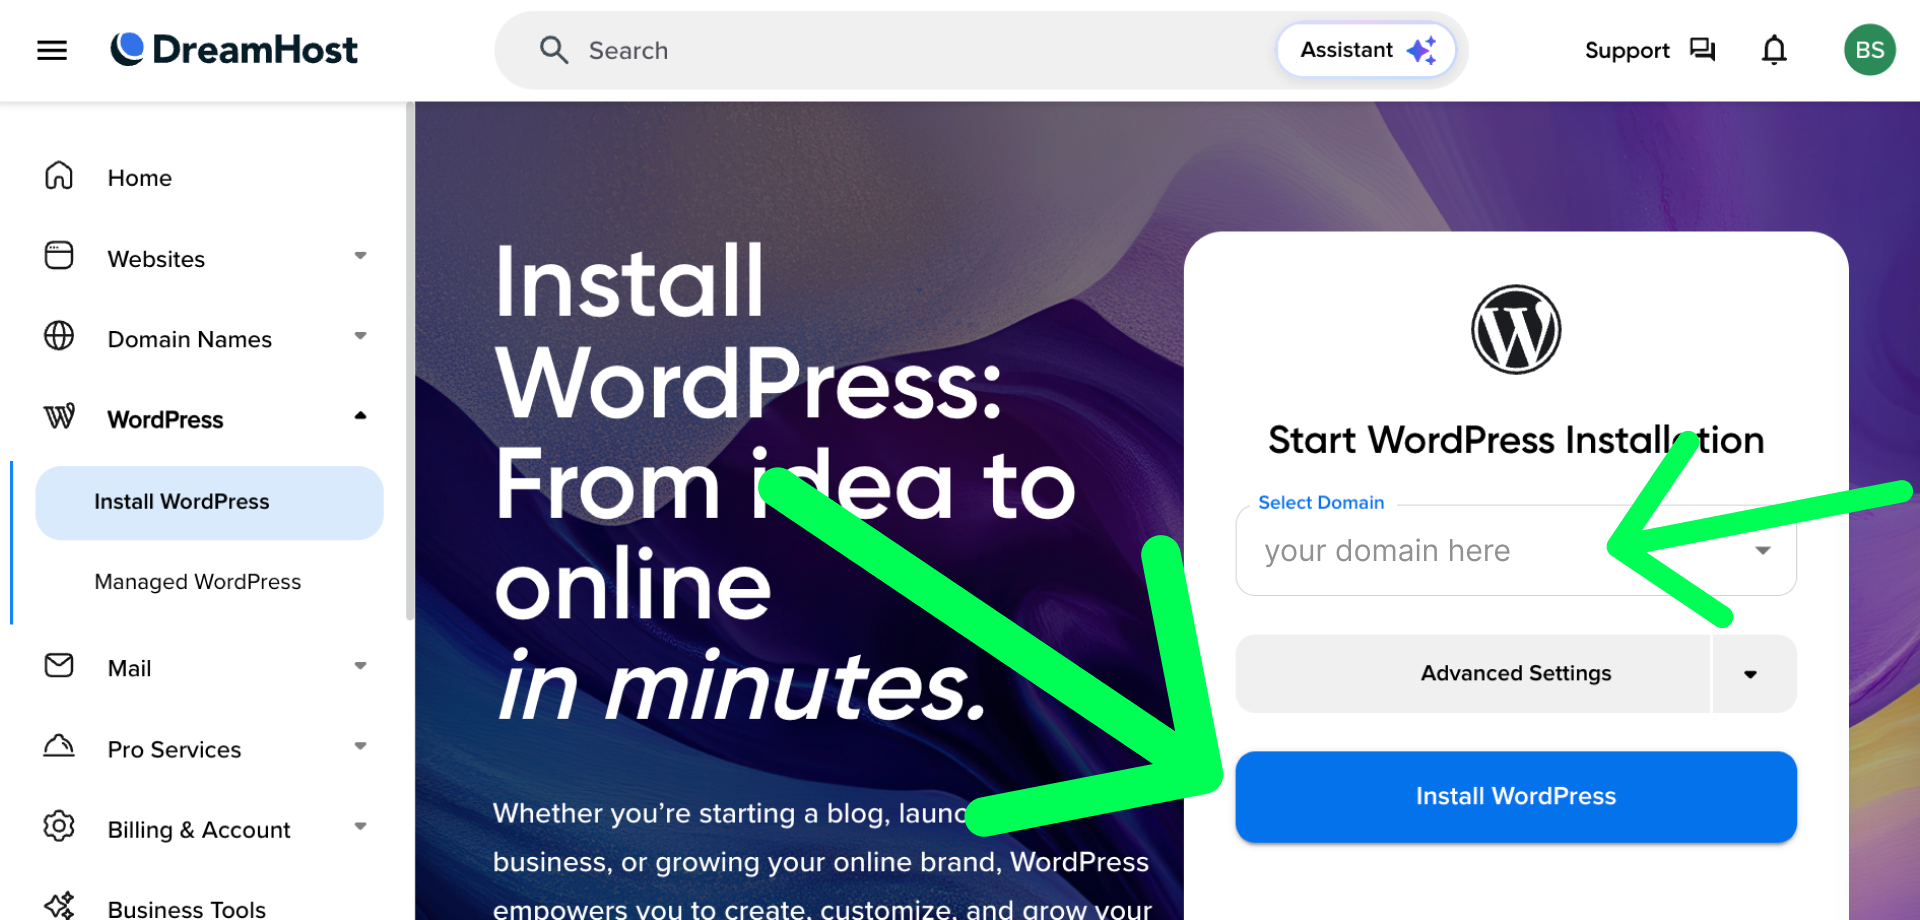
Make sure your domain is selected and then click the big blue “Install WordPress” button. On the next screen you’ll have to make a decision, let’s look at the screenshot together:
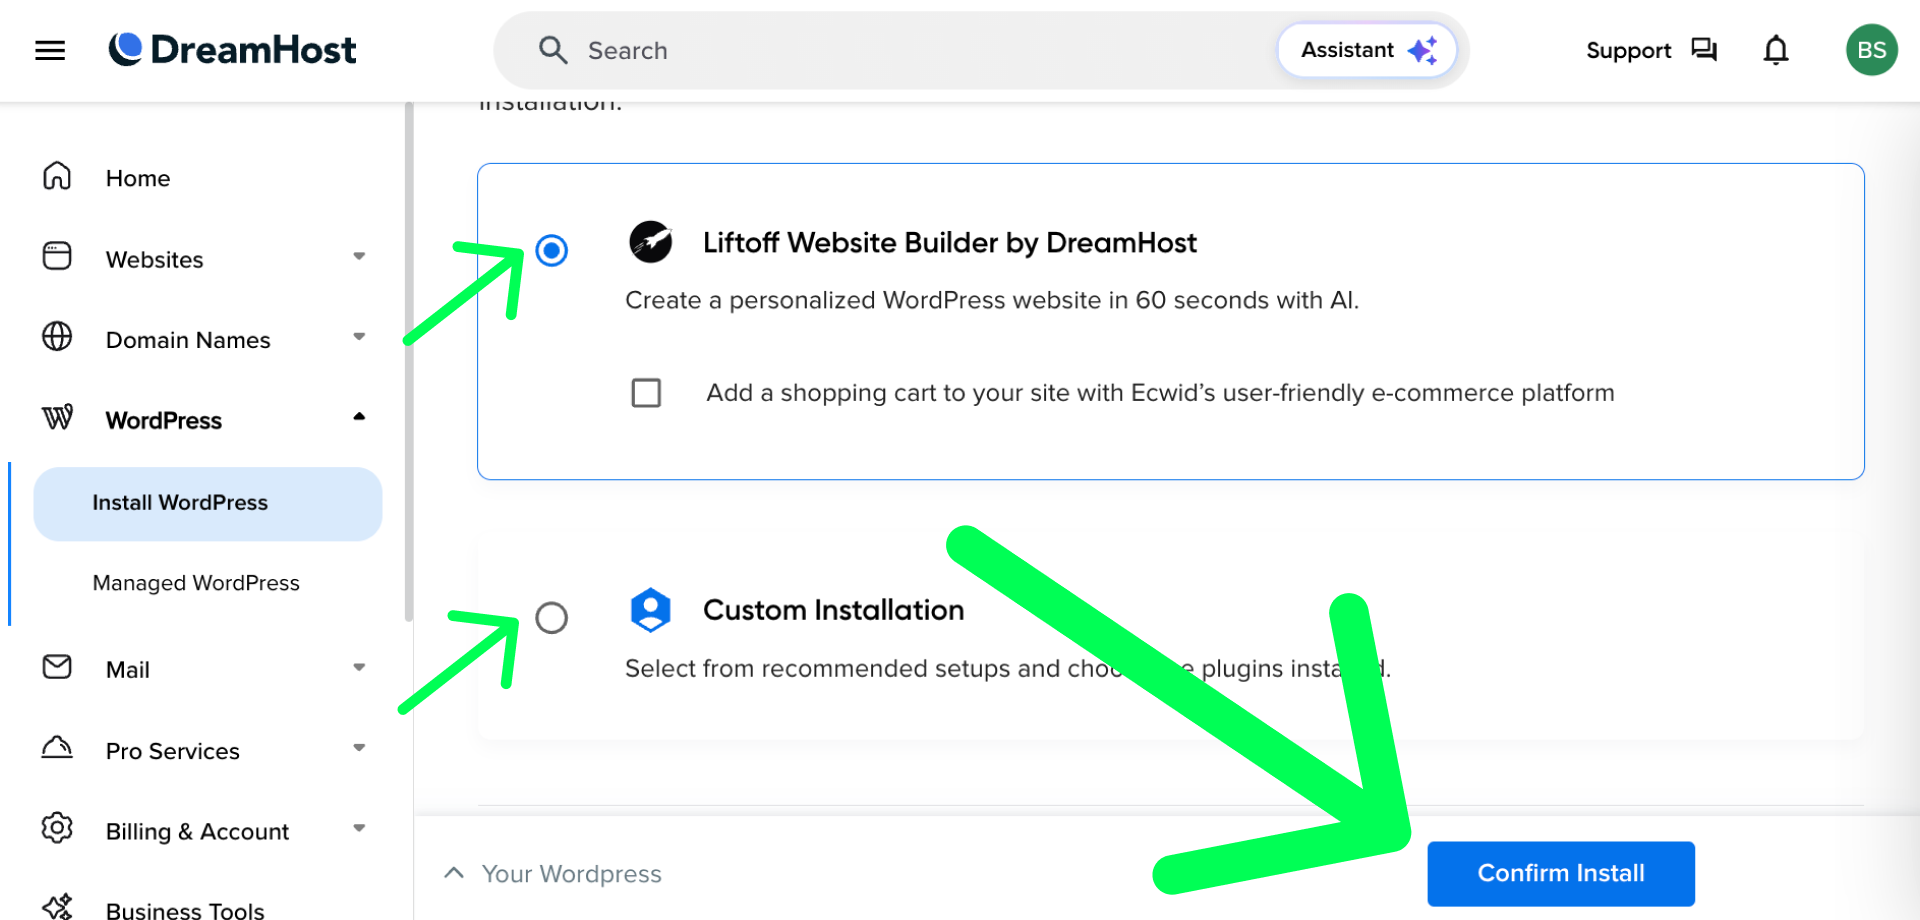
Remember when we talked about options A and B a couple of minutes ago? This is where you make that decision. If you want a finished website created for you choose the Liftoff Website Builder option. If you want to create the pages, choose the images and write the text on your site from the start choose the Custom Installation option.
If you choose the Liftoff Option the process is very intuitive, and you can skip the next paragraph or so, however you’ll still want to keep reading my guide, as knowing how and where to log into your site that it creates for you can be confusing.
If you chose the Custom Installation option you will then see this as the next screen:
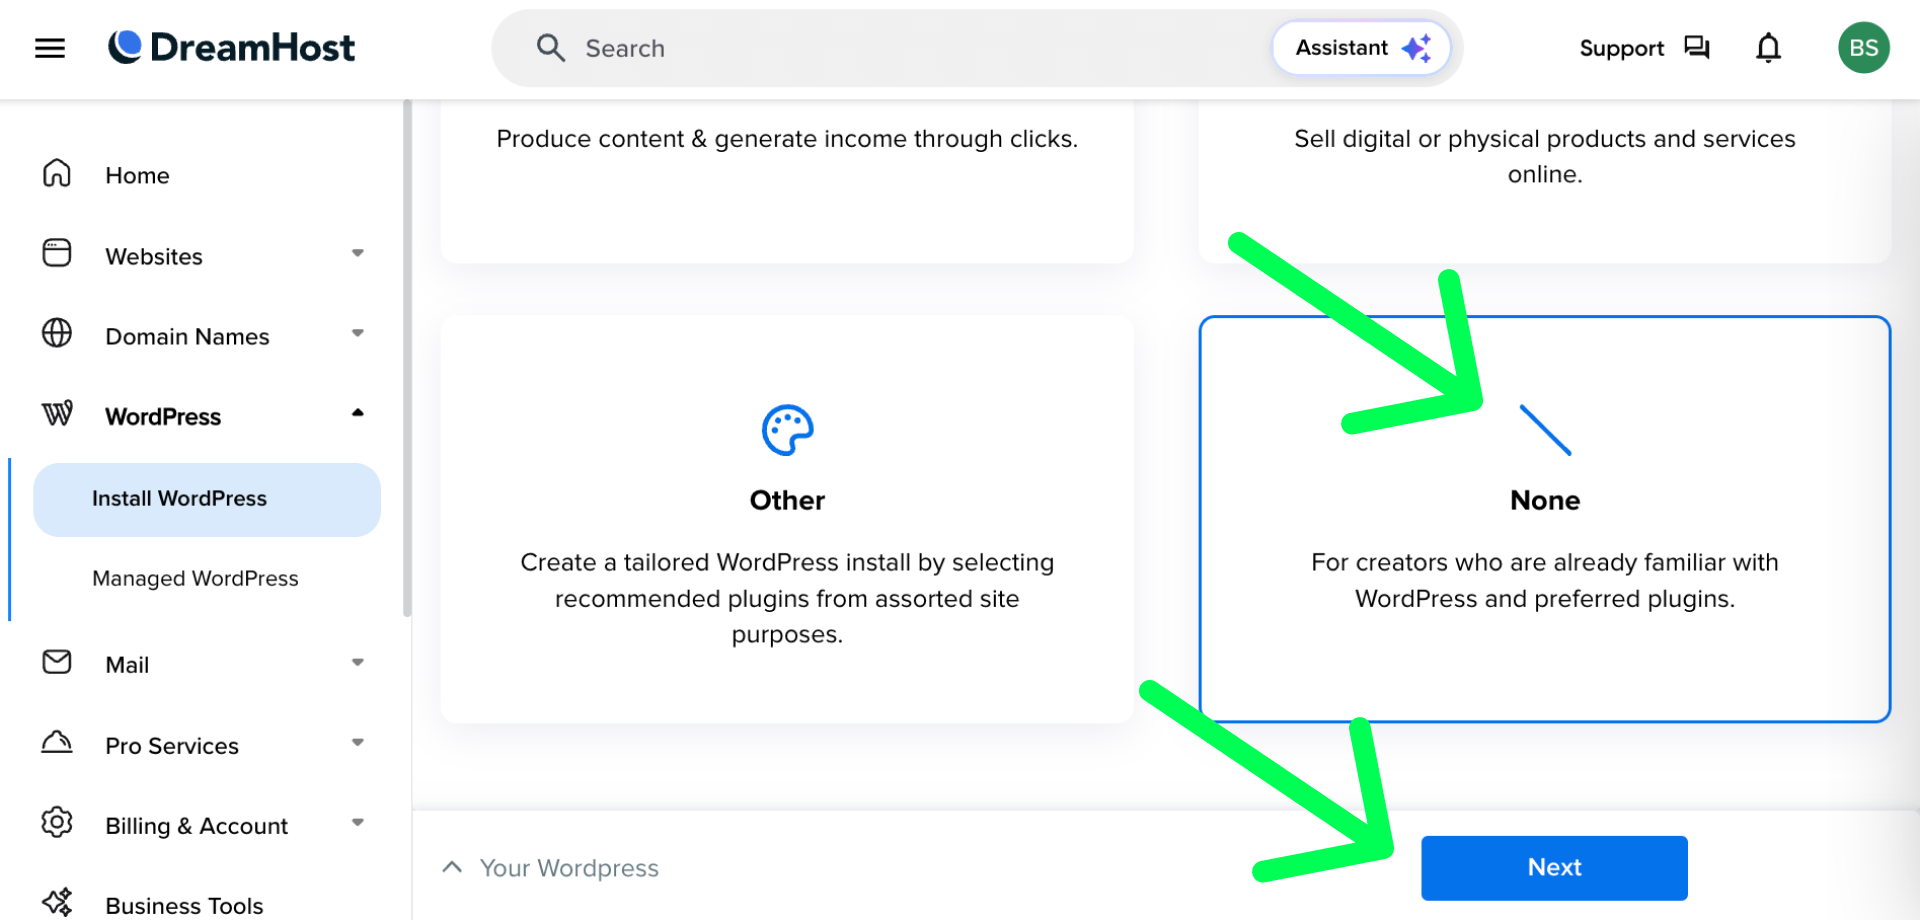
I recommend choosing the “None” option towards the bottom right, and then clicking the blue “Next” button. The next screen doesn’t require any decisions and you can safely click the blue “Confirm Install” button towards the bottom right.
You’ll then see a screen showing a waiting or “progress” bar like the screenshot below. This is great news; it means DreamHost is installing WordPress for you and it shouldn’t take much more than 5 minutes.

When the progress bar finishes, I recommend clicking “Home” towards the top left of the left hand menu. Then click on “Websites” (right below Home) and in the new menu it shows click on the “Manage Websites” text.
Viewing & Managing Your Site
From the “Manage Websites” screen you’ll see your domain. You can click on the actual domain name to visit your website in a new tab. That is what the public sees when they visit your website. Right now we’re more interested in how to log in as the “owner” or “creator” of the website so that you can start creating pages, uploading images or editing the text on the site. To do that, click the “W” icon. I’ve highlighted the W icon in yellow in the screenshot below for you:
Clicking that “W” icon will automagically log you into your WordPress website as the owner and creator. You should see a screen that looks something like the screenshot below:
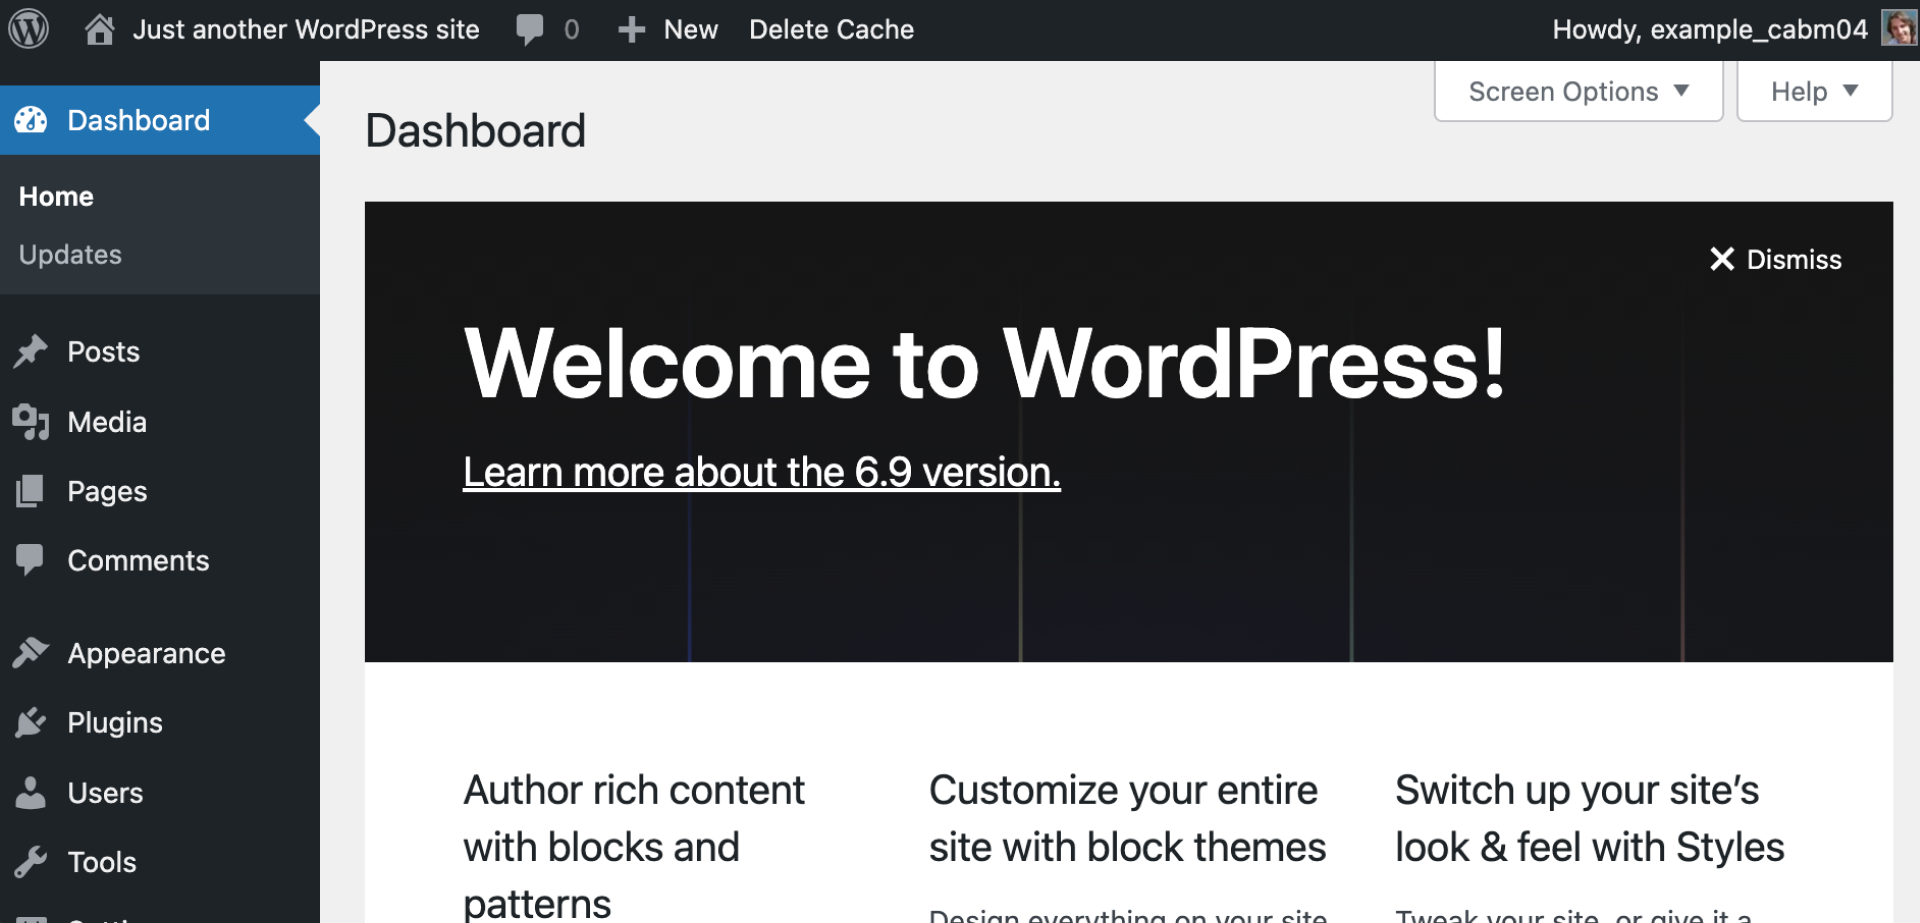
You will then be taken to the “owner dashboard” of your website which is private; the public can never see it. Only you can see it and this is where you can create and edit pages, upload images, change your website’s text and anything else you can imagine.
If you ever get logged out as the owner of your website don’t worry. From the DreamHost dashboard and the “Manage Websites” site you can always click on the “W” icon to get automagically logged in again.
Now that you have WordPress installed at your domain and you know how to visit the owner’s dashboard you’re ready to actually start customizing or building your website, and that’s exactly what we’ll cover next!